Building and Launching a Sendd Store in 5 Minutes
In this tutorial, We will be covering how you can setup and start selling with your Sendd Store within minutes!
-
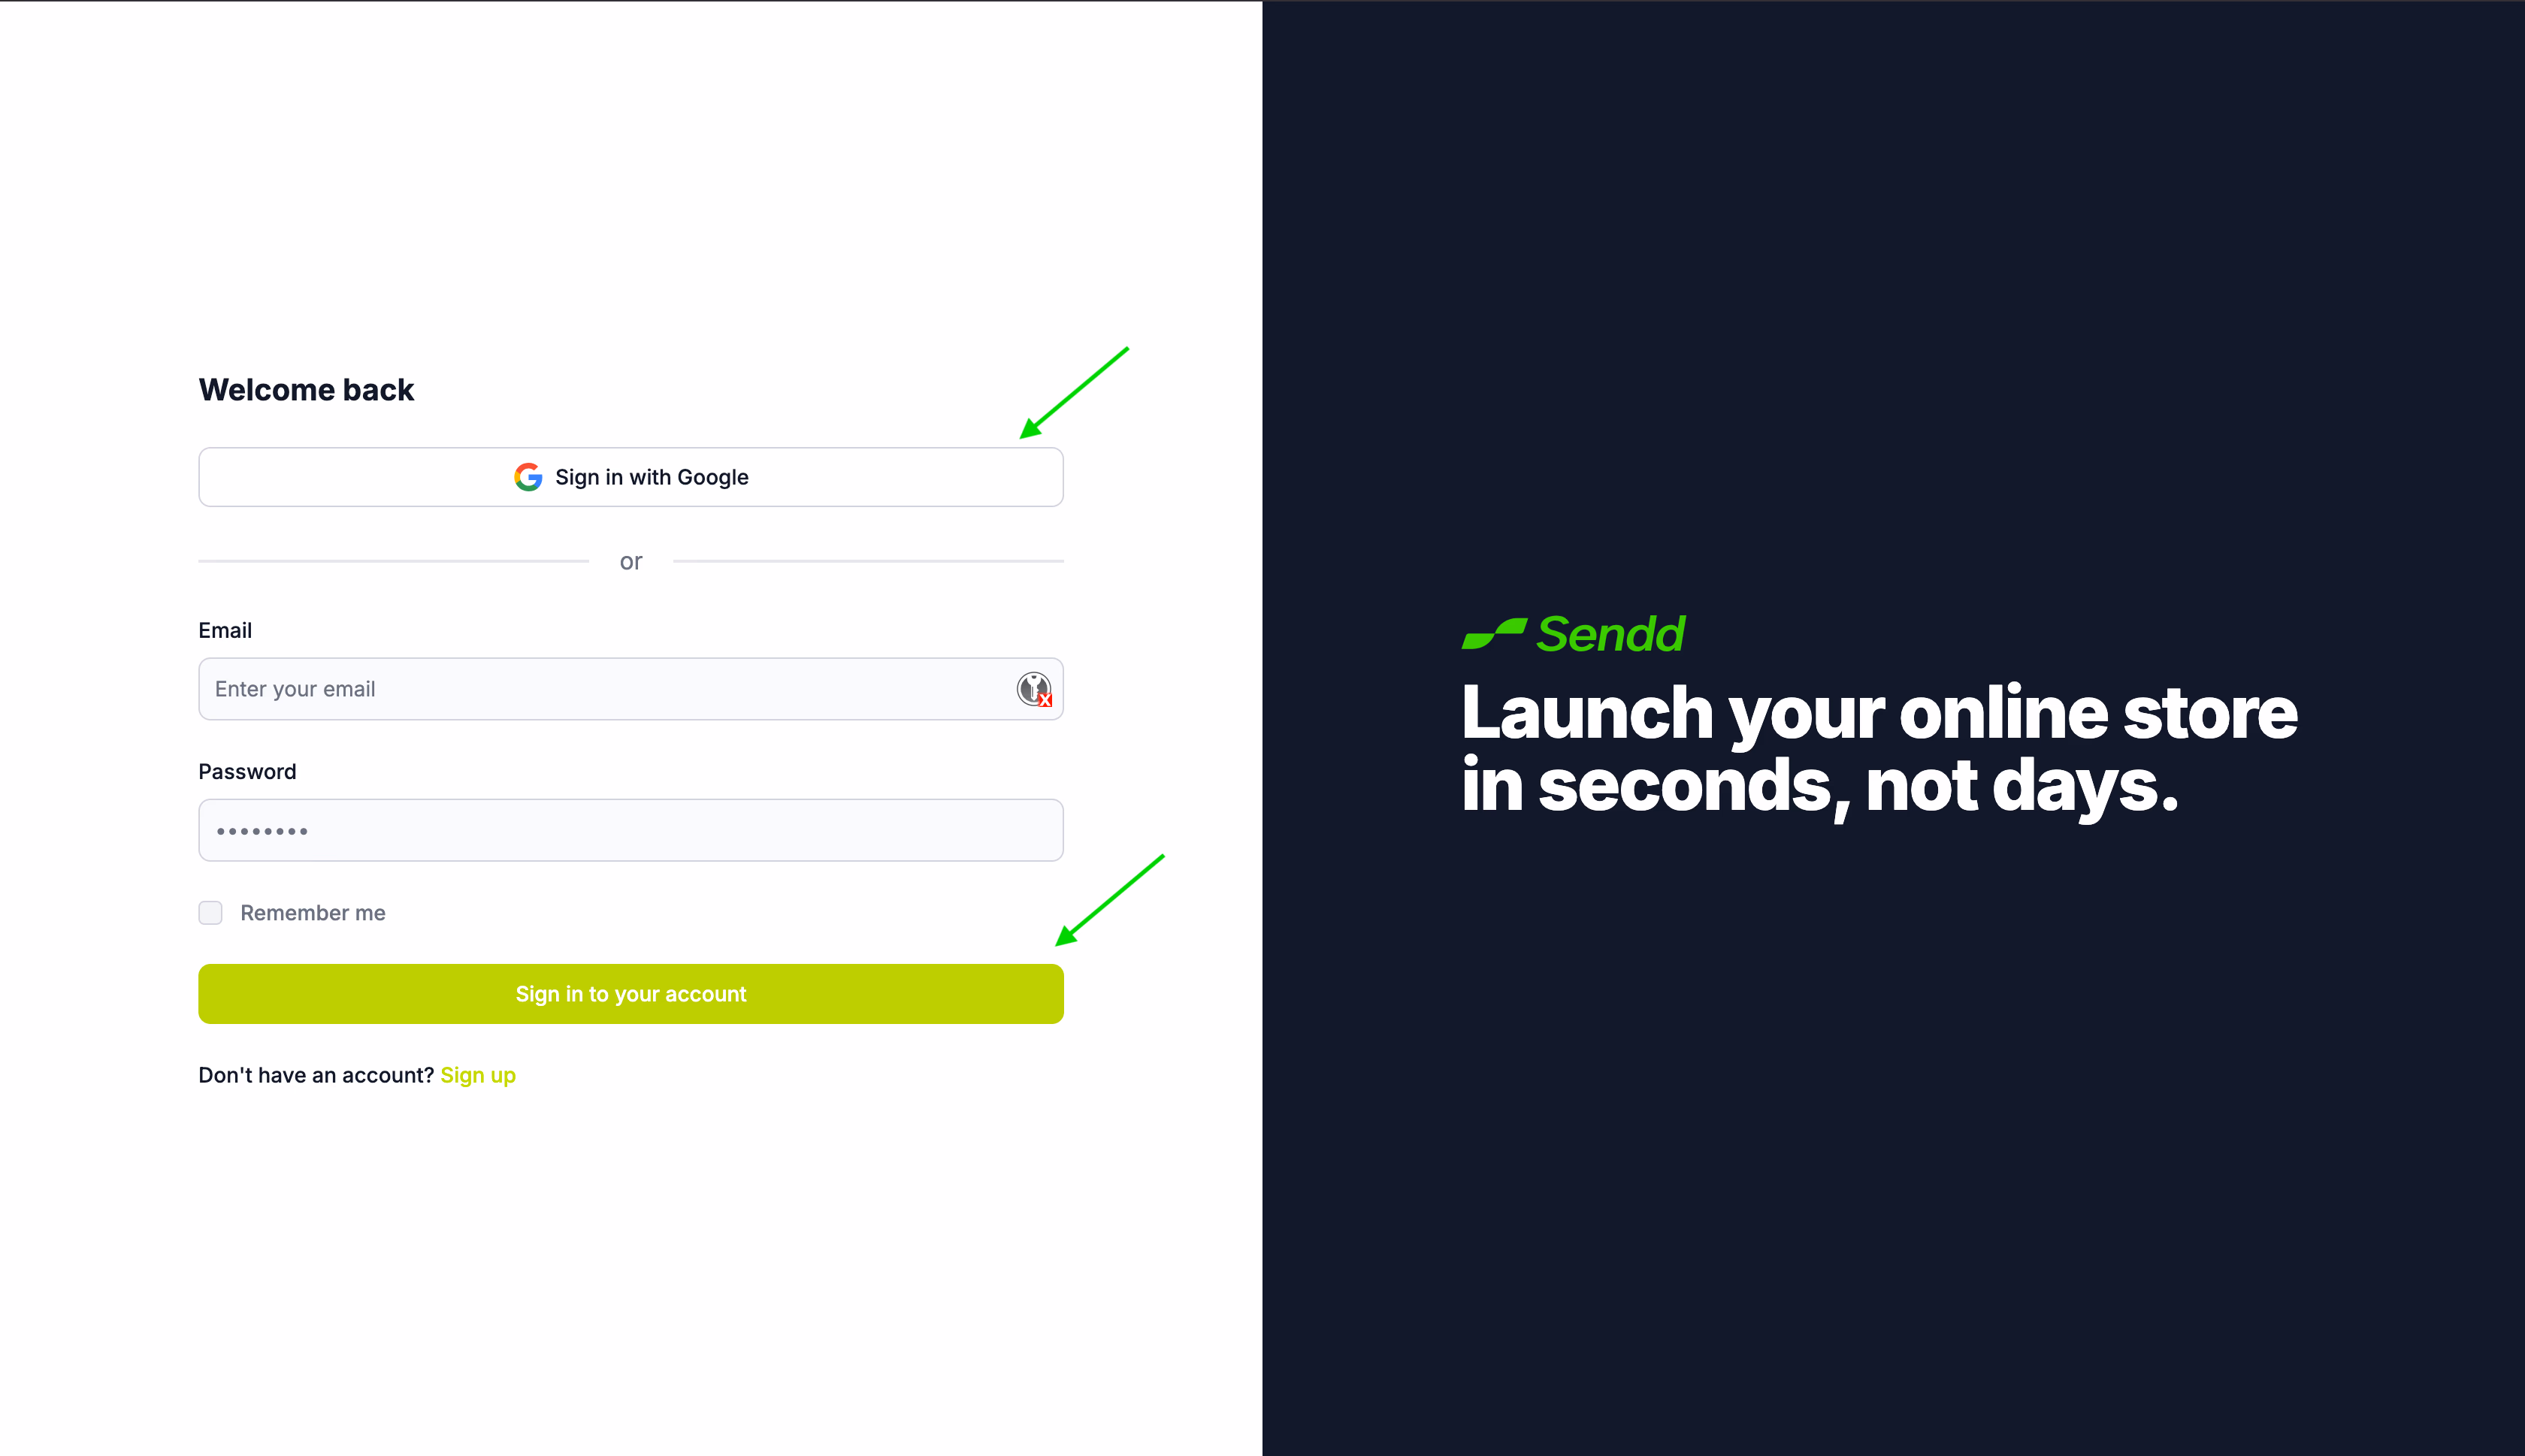
Go to https://sendd.store where you will be met with a login page. Enter your login details or easily sign in with Google.
-
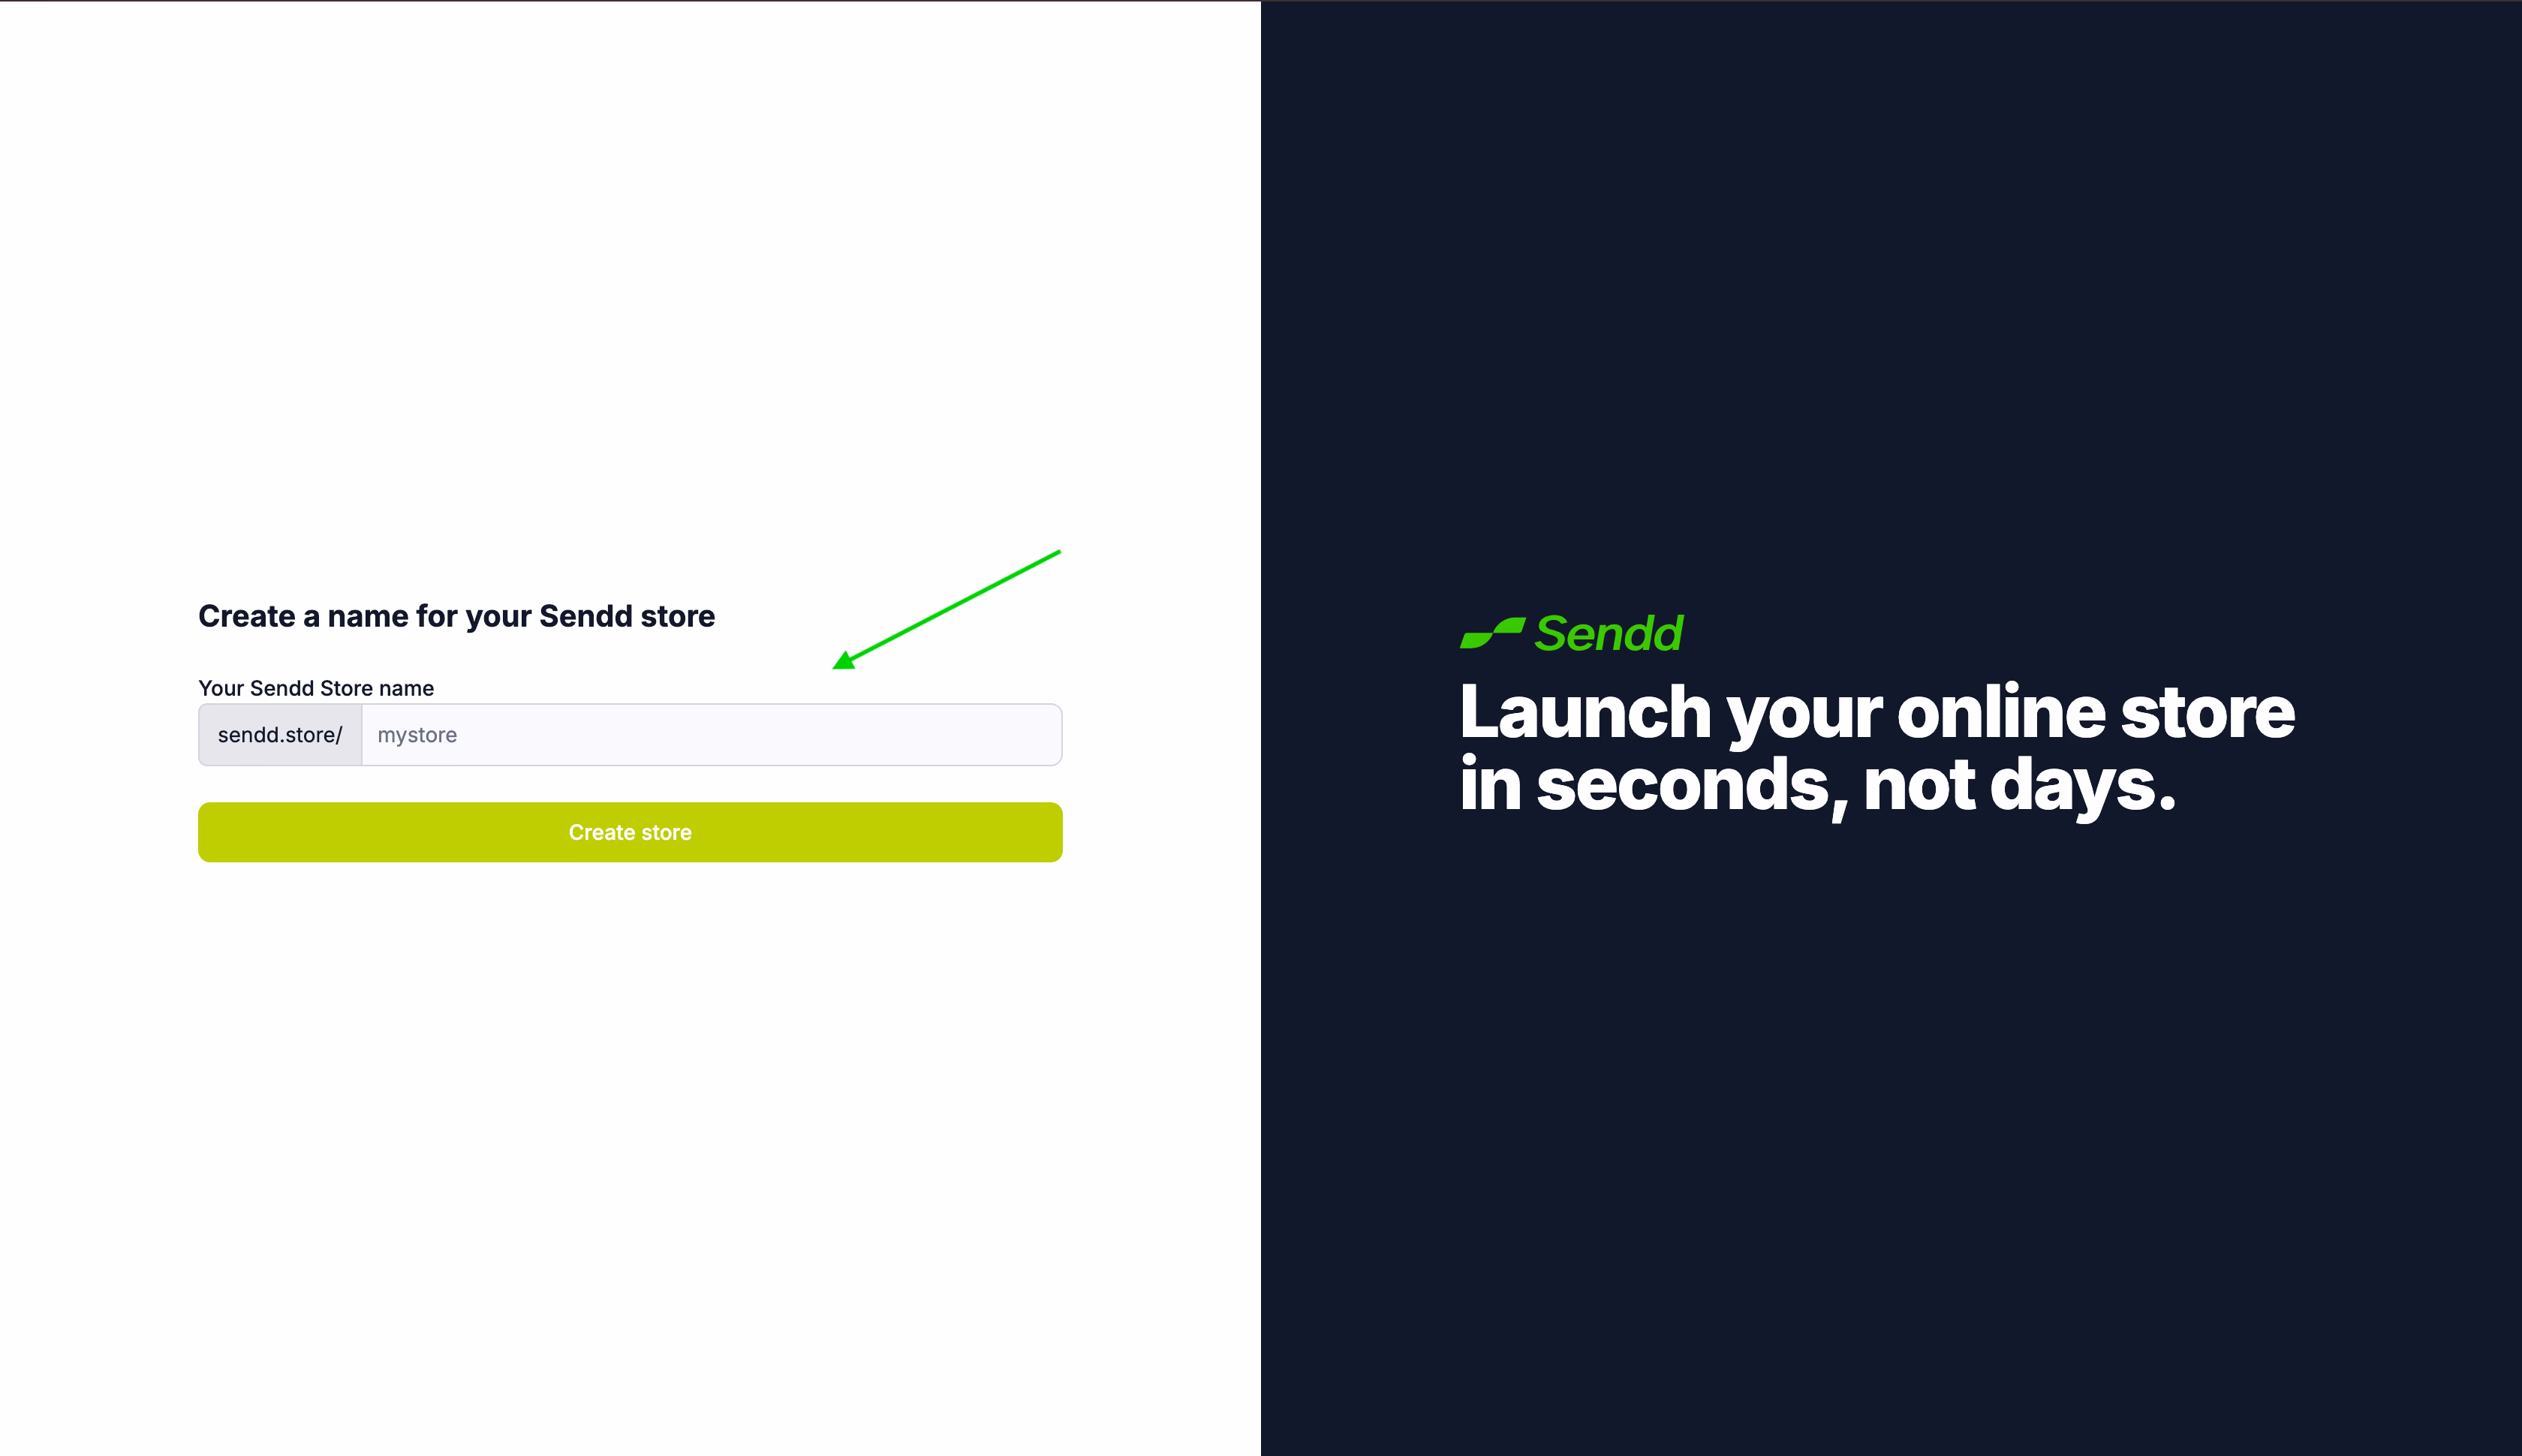
You will be prompted to enter a new store name for yourself. Go ahead and name your store!
-
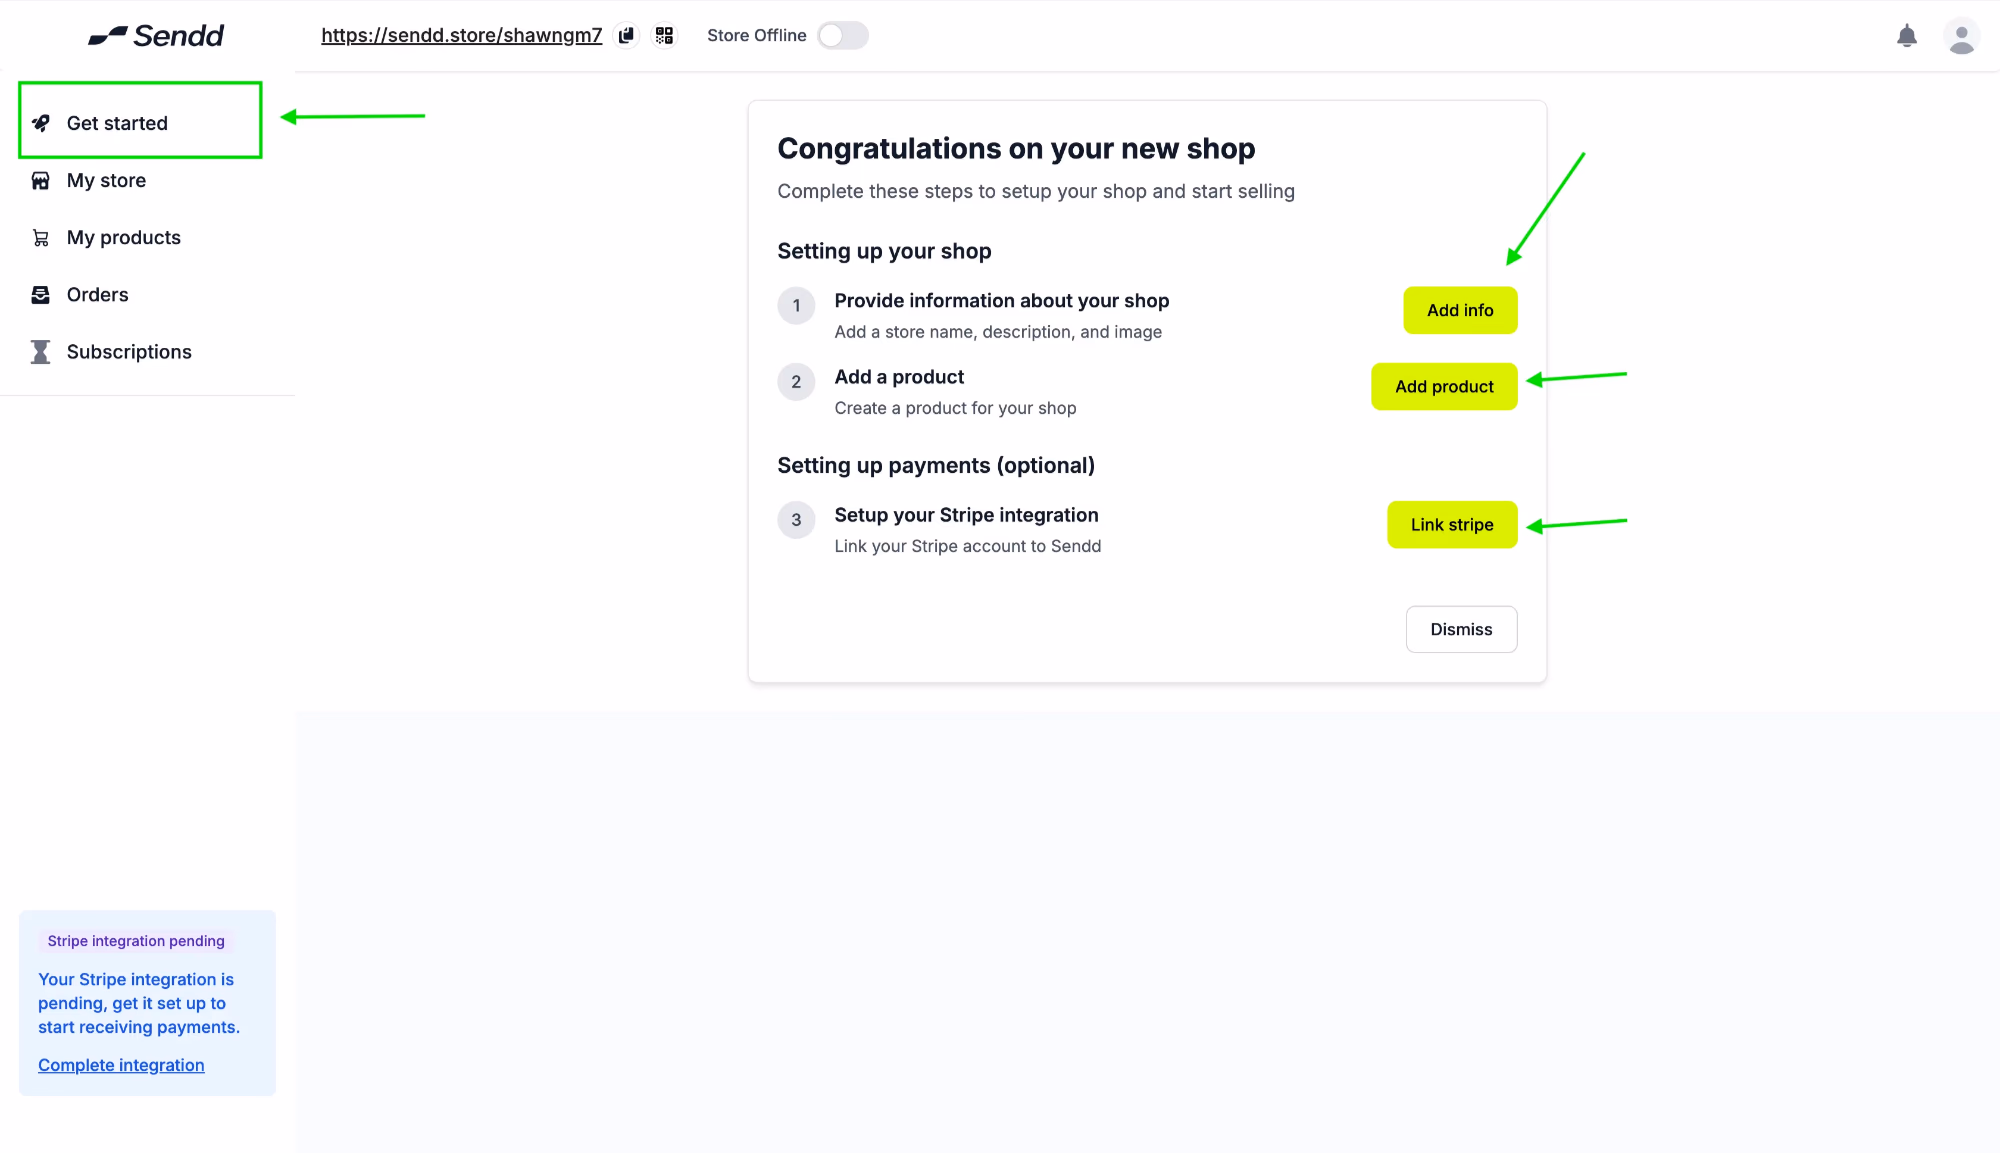
Now you are at the start of building a great one stop shop for your products. As you can see below, your sendd store is not designed or filled out yet, lets get you started by clicking on Get Started.
As you can see you have three options to go with to setup your Sendd Store:
- Add Info: takes you to your store so that you can start filling out more information on your store details.
- Add Product: helps you add your product or service onto your store.
- Link Stripe: gets you setup with Stripe’s payment processor, so that you can start receiving payments through Sendd Store.
-
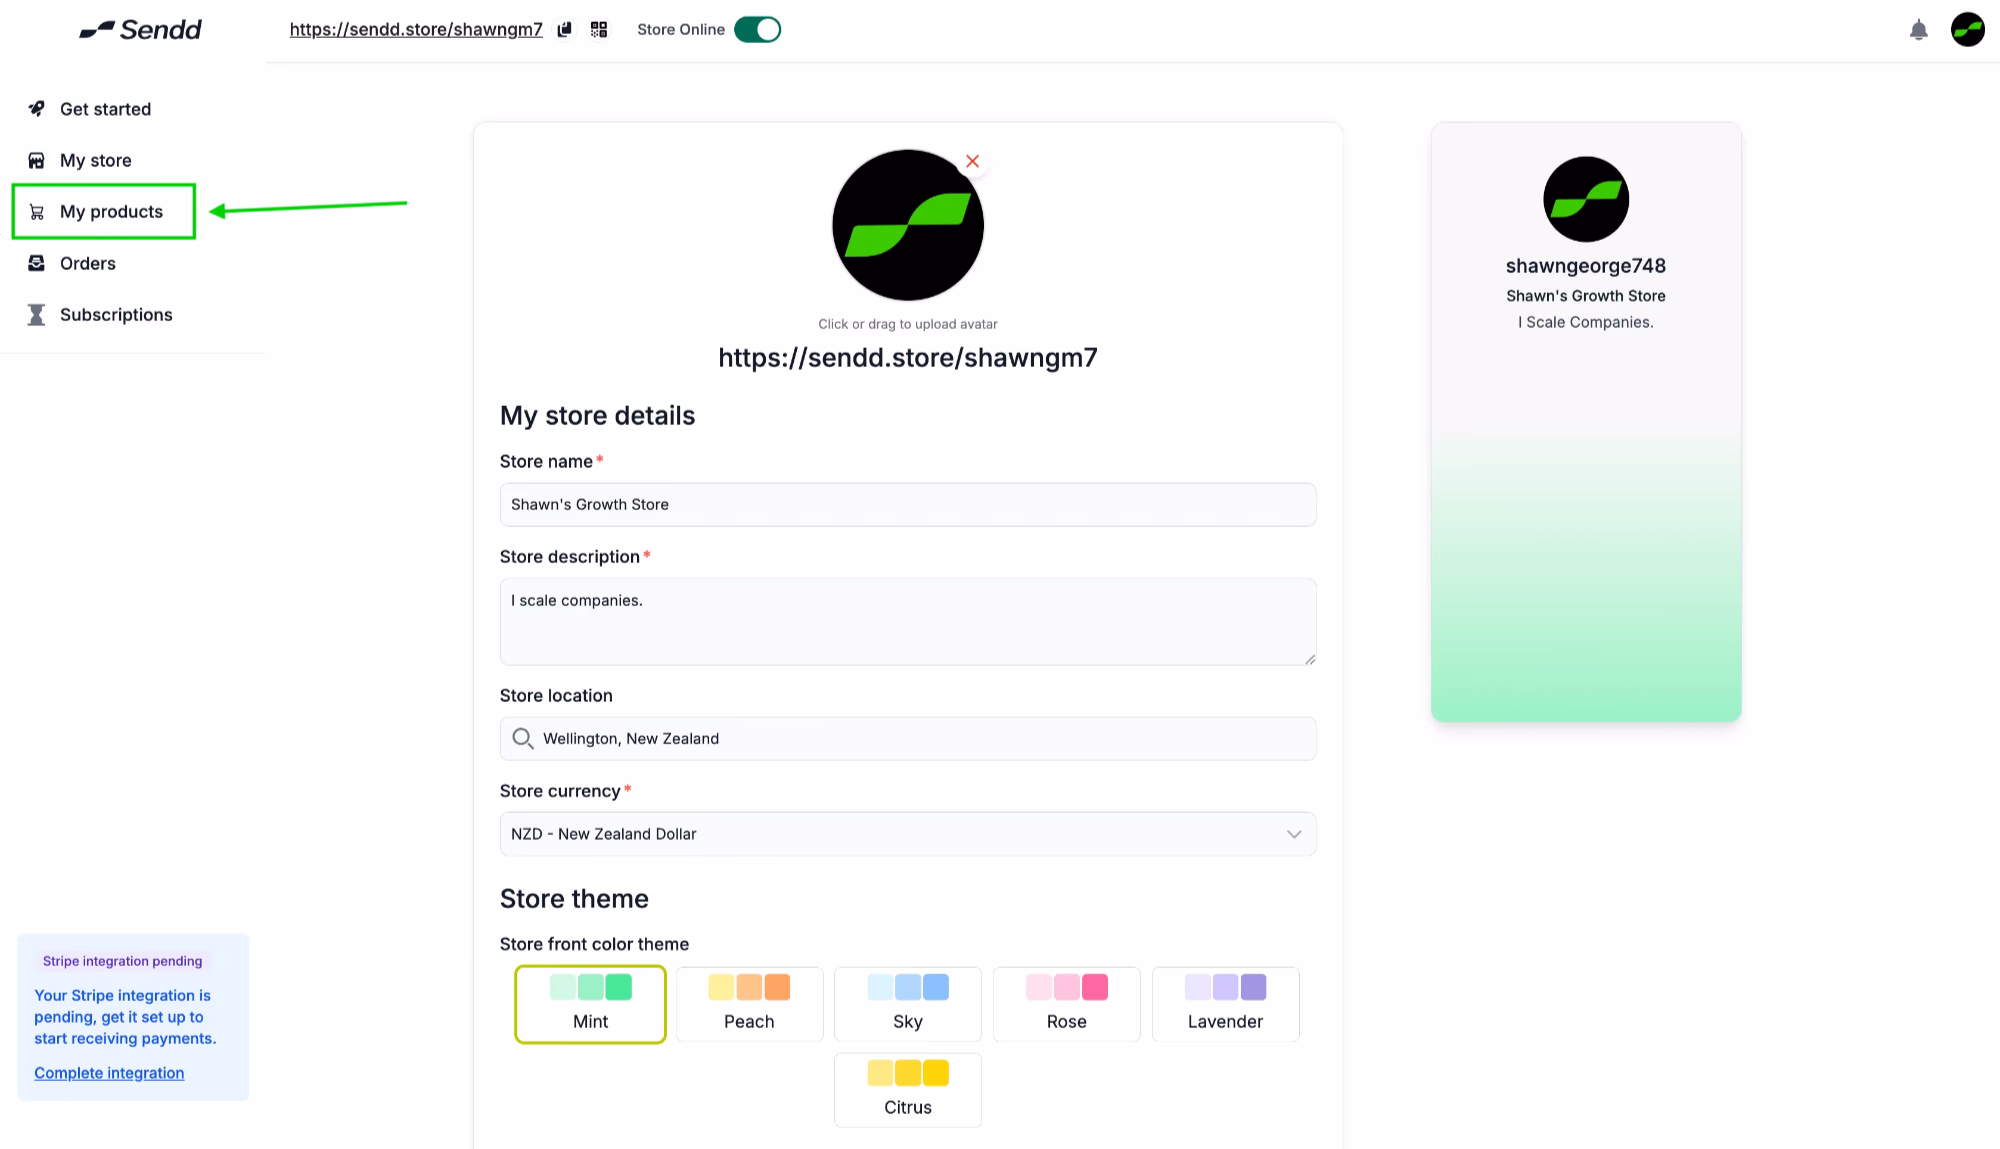
Lets go ahead and click on Add Info. Upload an image into your Sendd Store and also go ahead and add in all your store details.
-
In the final section of adding your info, you have an option to choose between two styles of Sendd Store UIs and also the link to adding your social media links.
- It is recommended to go with the New Storefront UI if you have more than 4 products.
- For the Legacy Storefront UI, its better to be at 4 products or under.
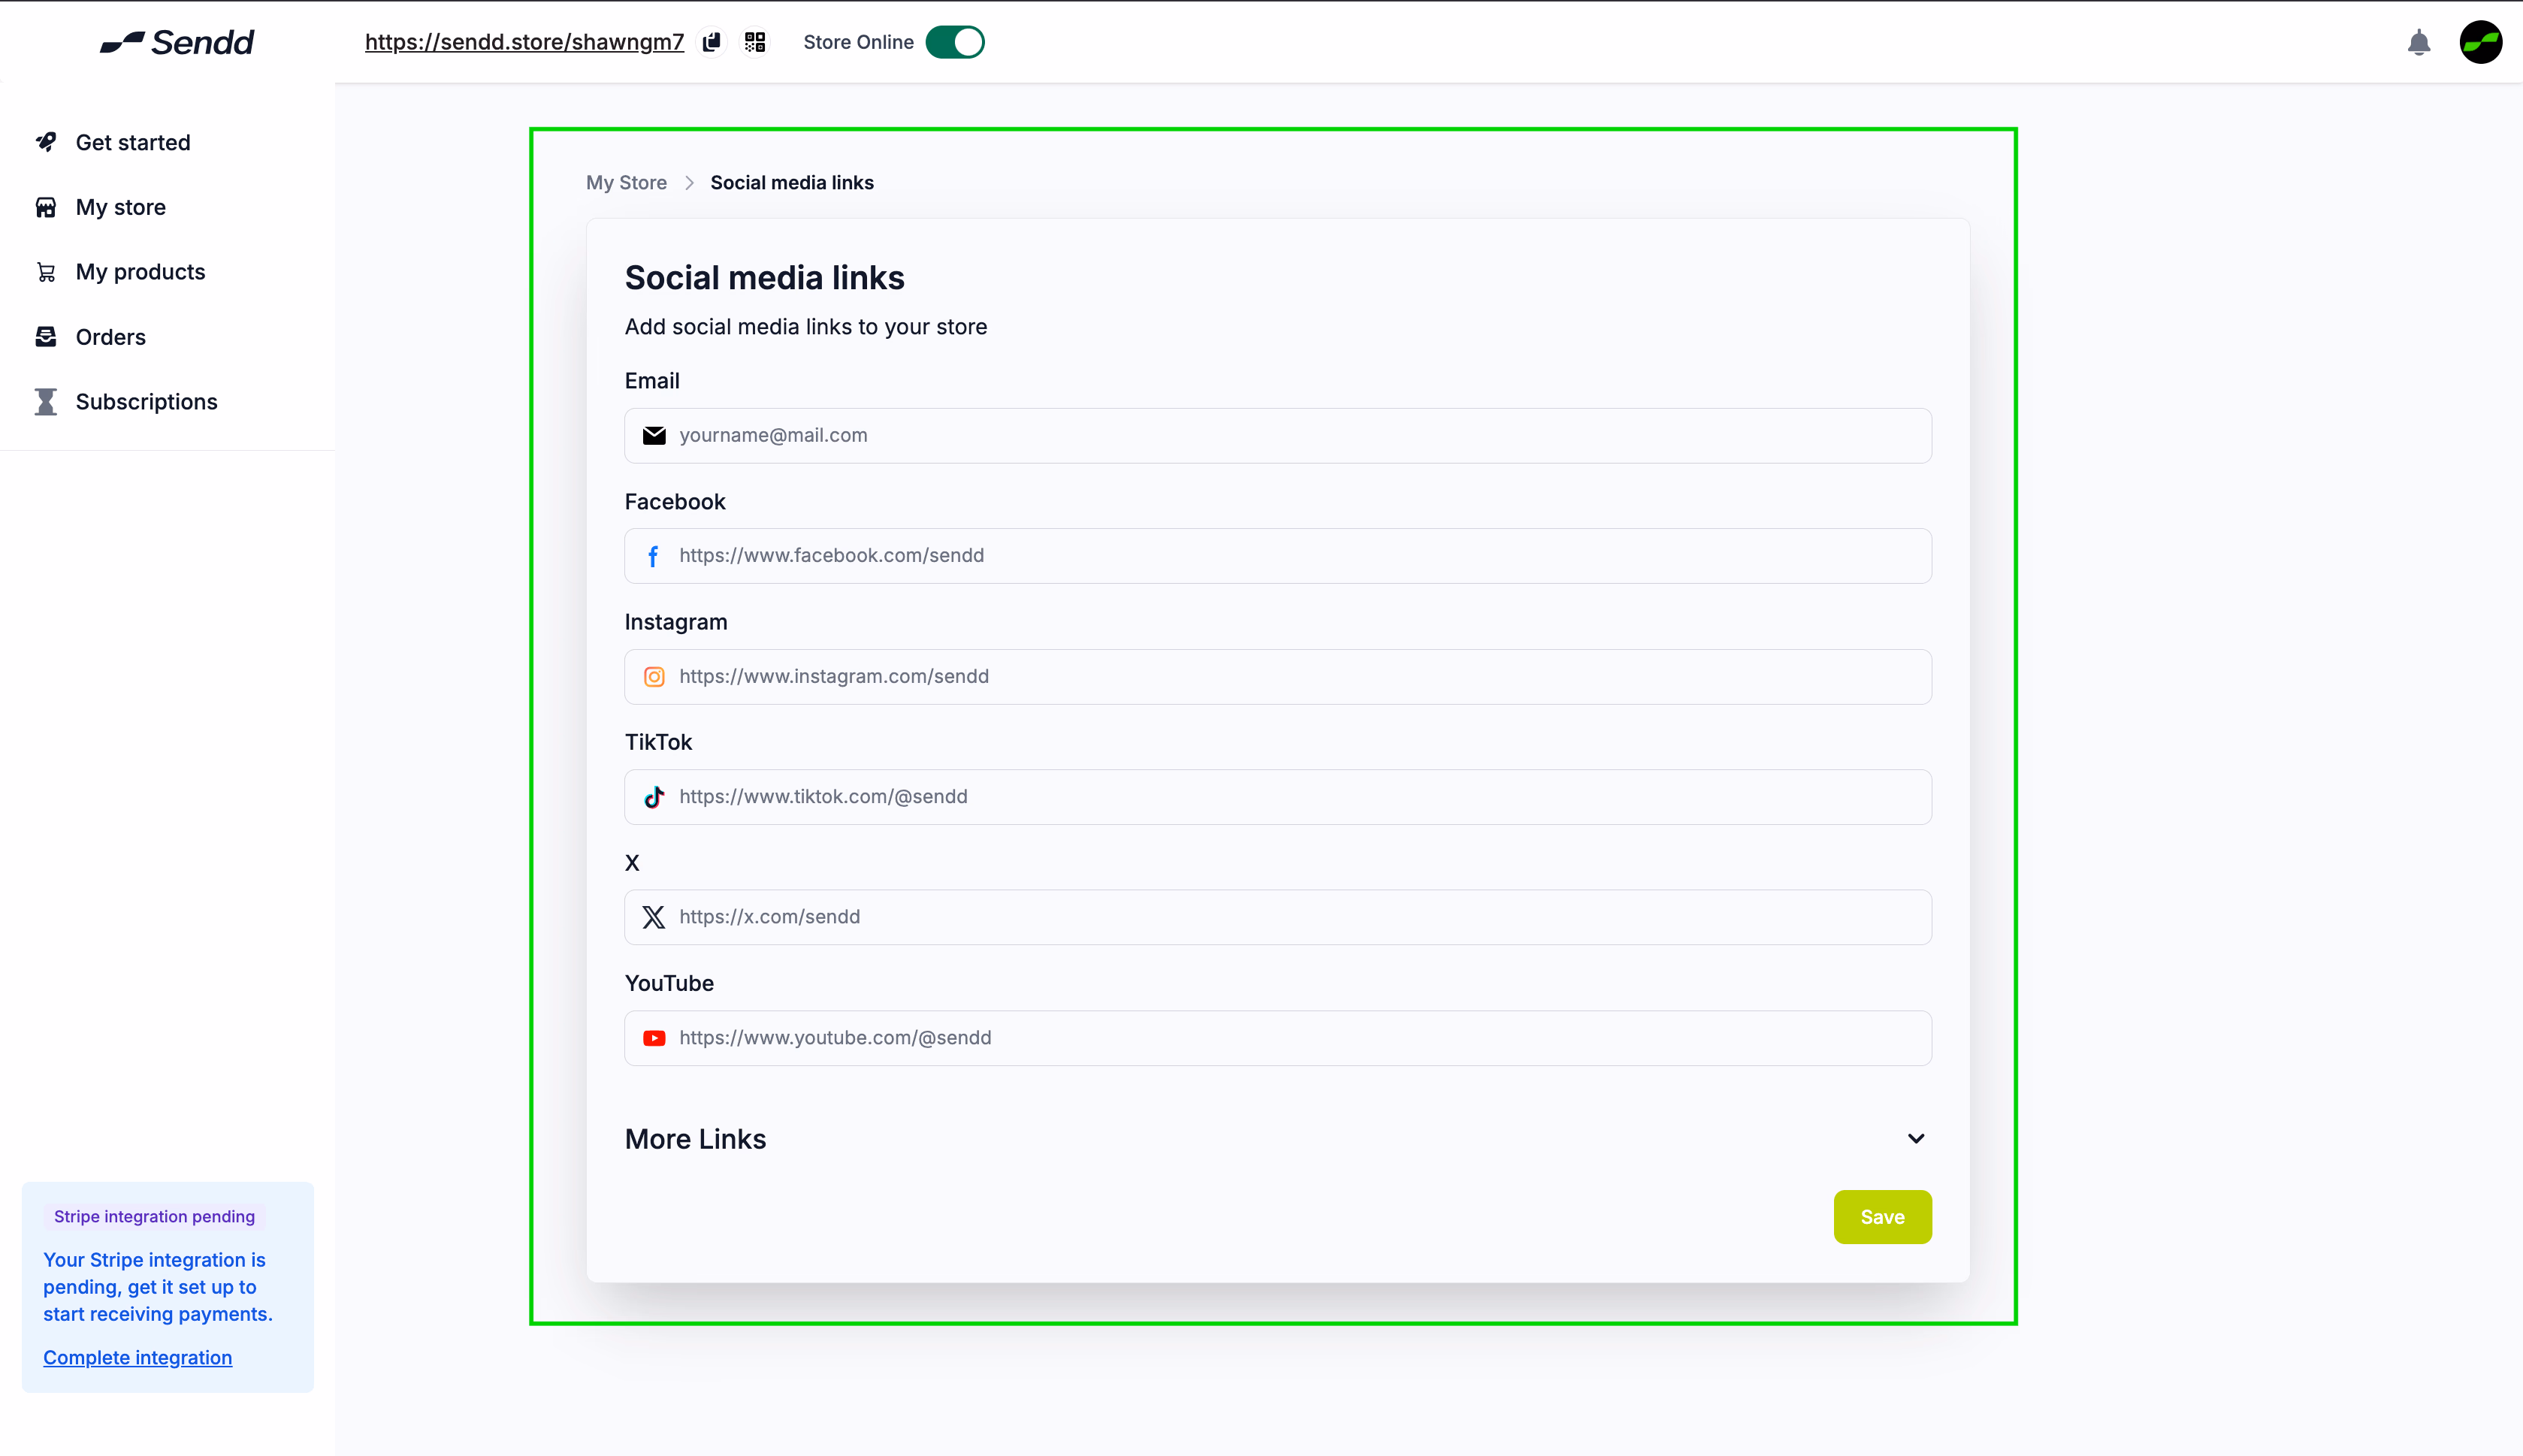
- Click on Add Links to start adding direct links to your Social Media Store.
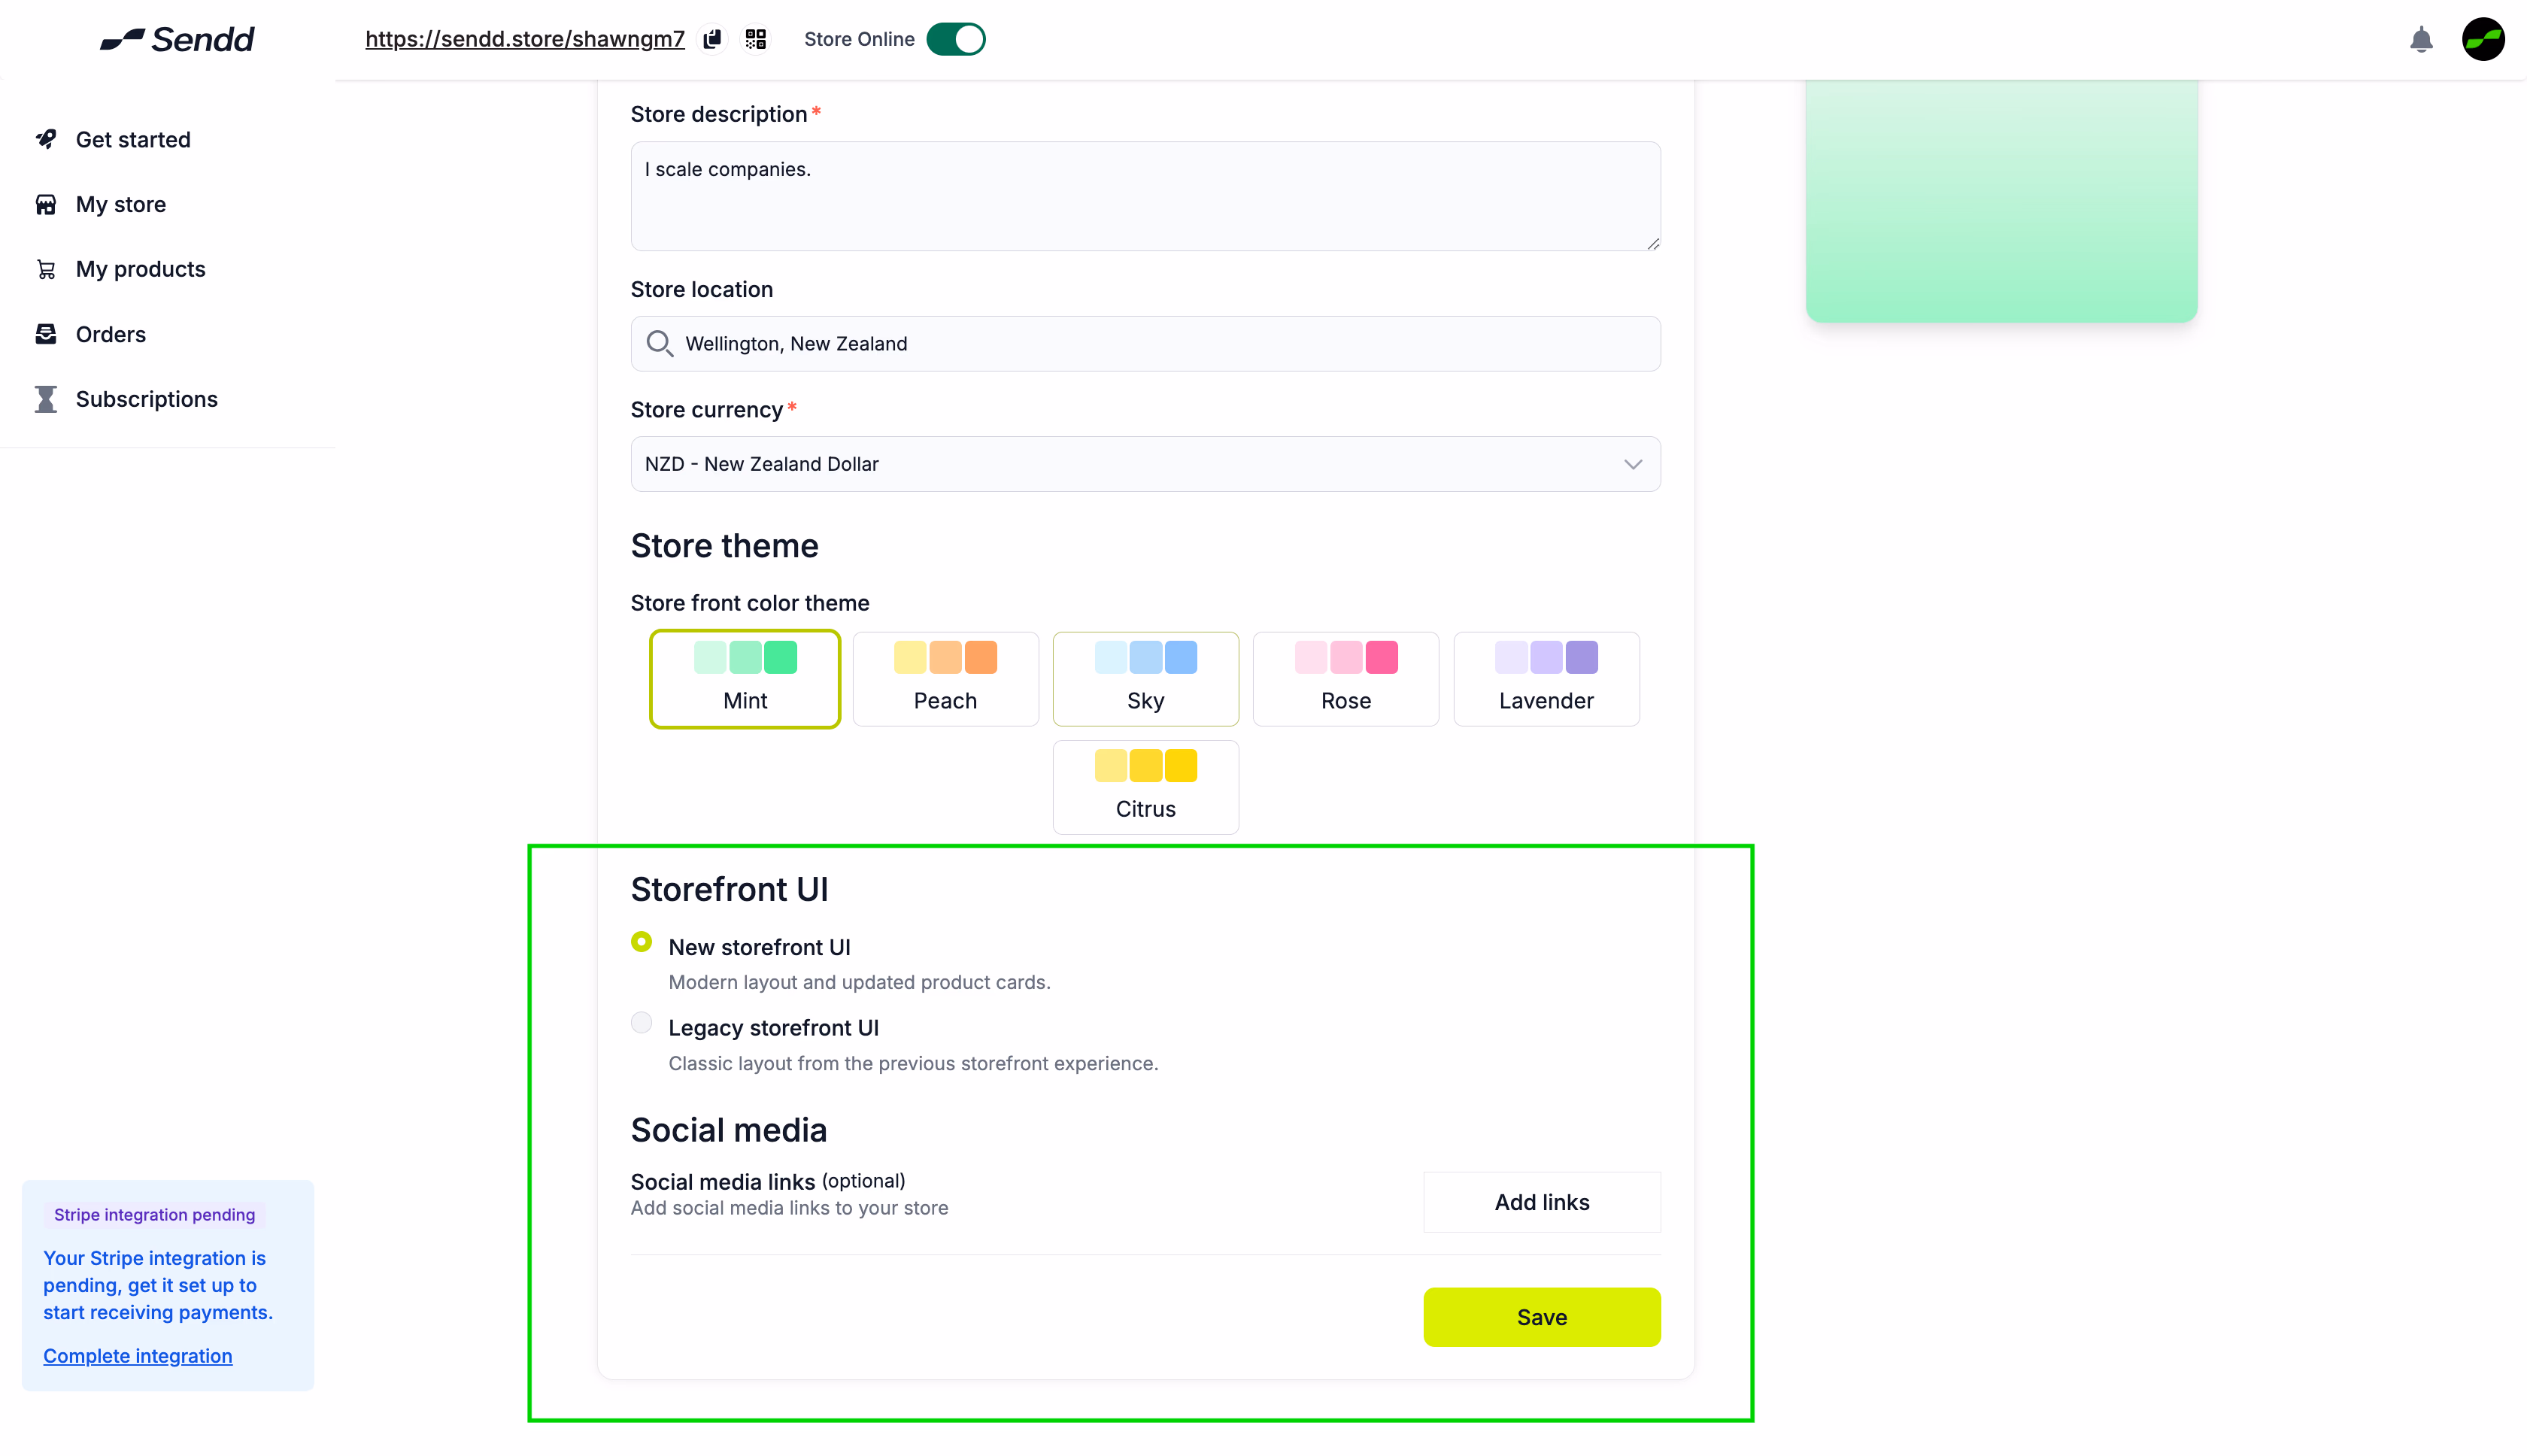
Note: Once you click on Add Links, you will come to the Social Media Links page and you can add all of the links directly and hit Save.
Listing a Product
-
We are done with the Add Info page.
-
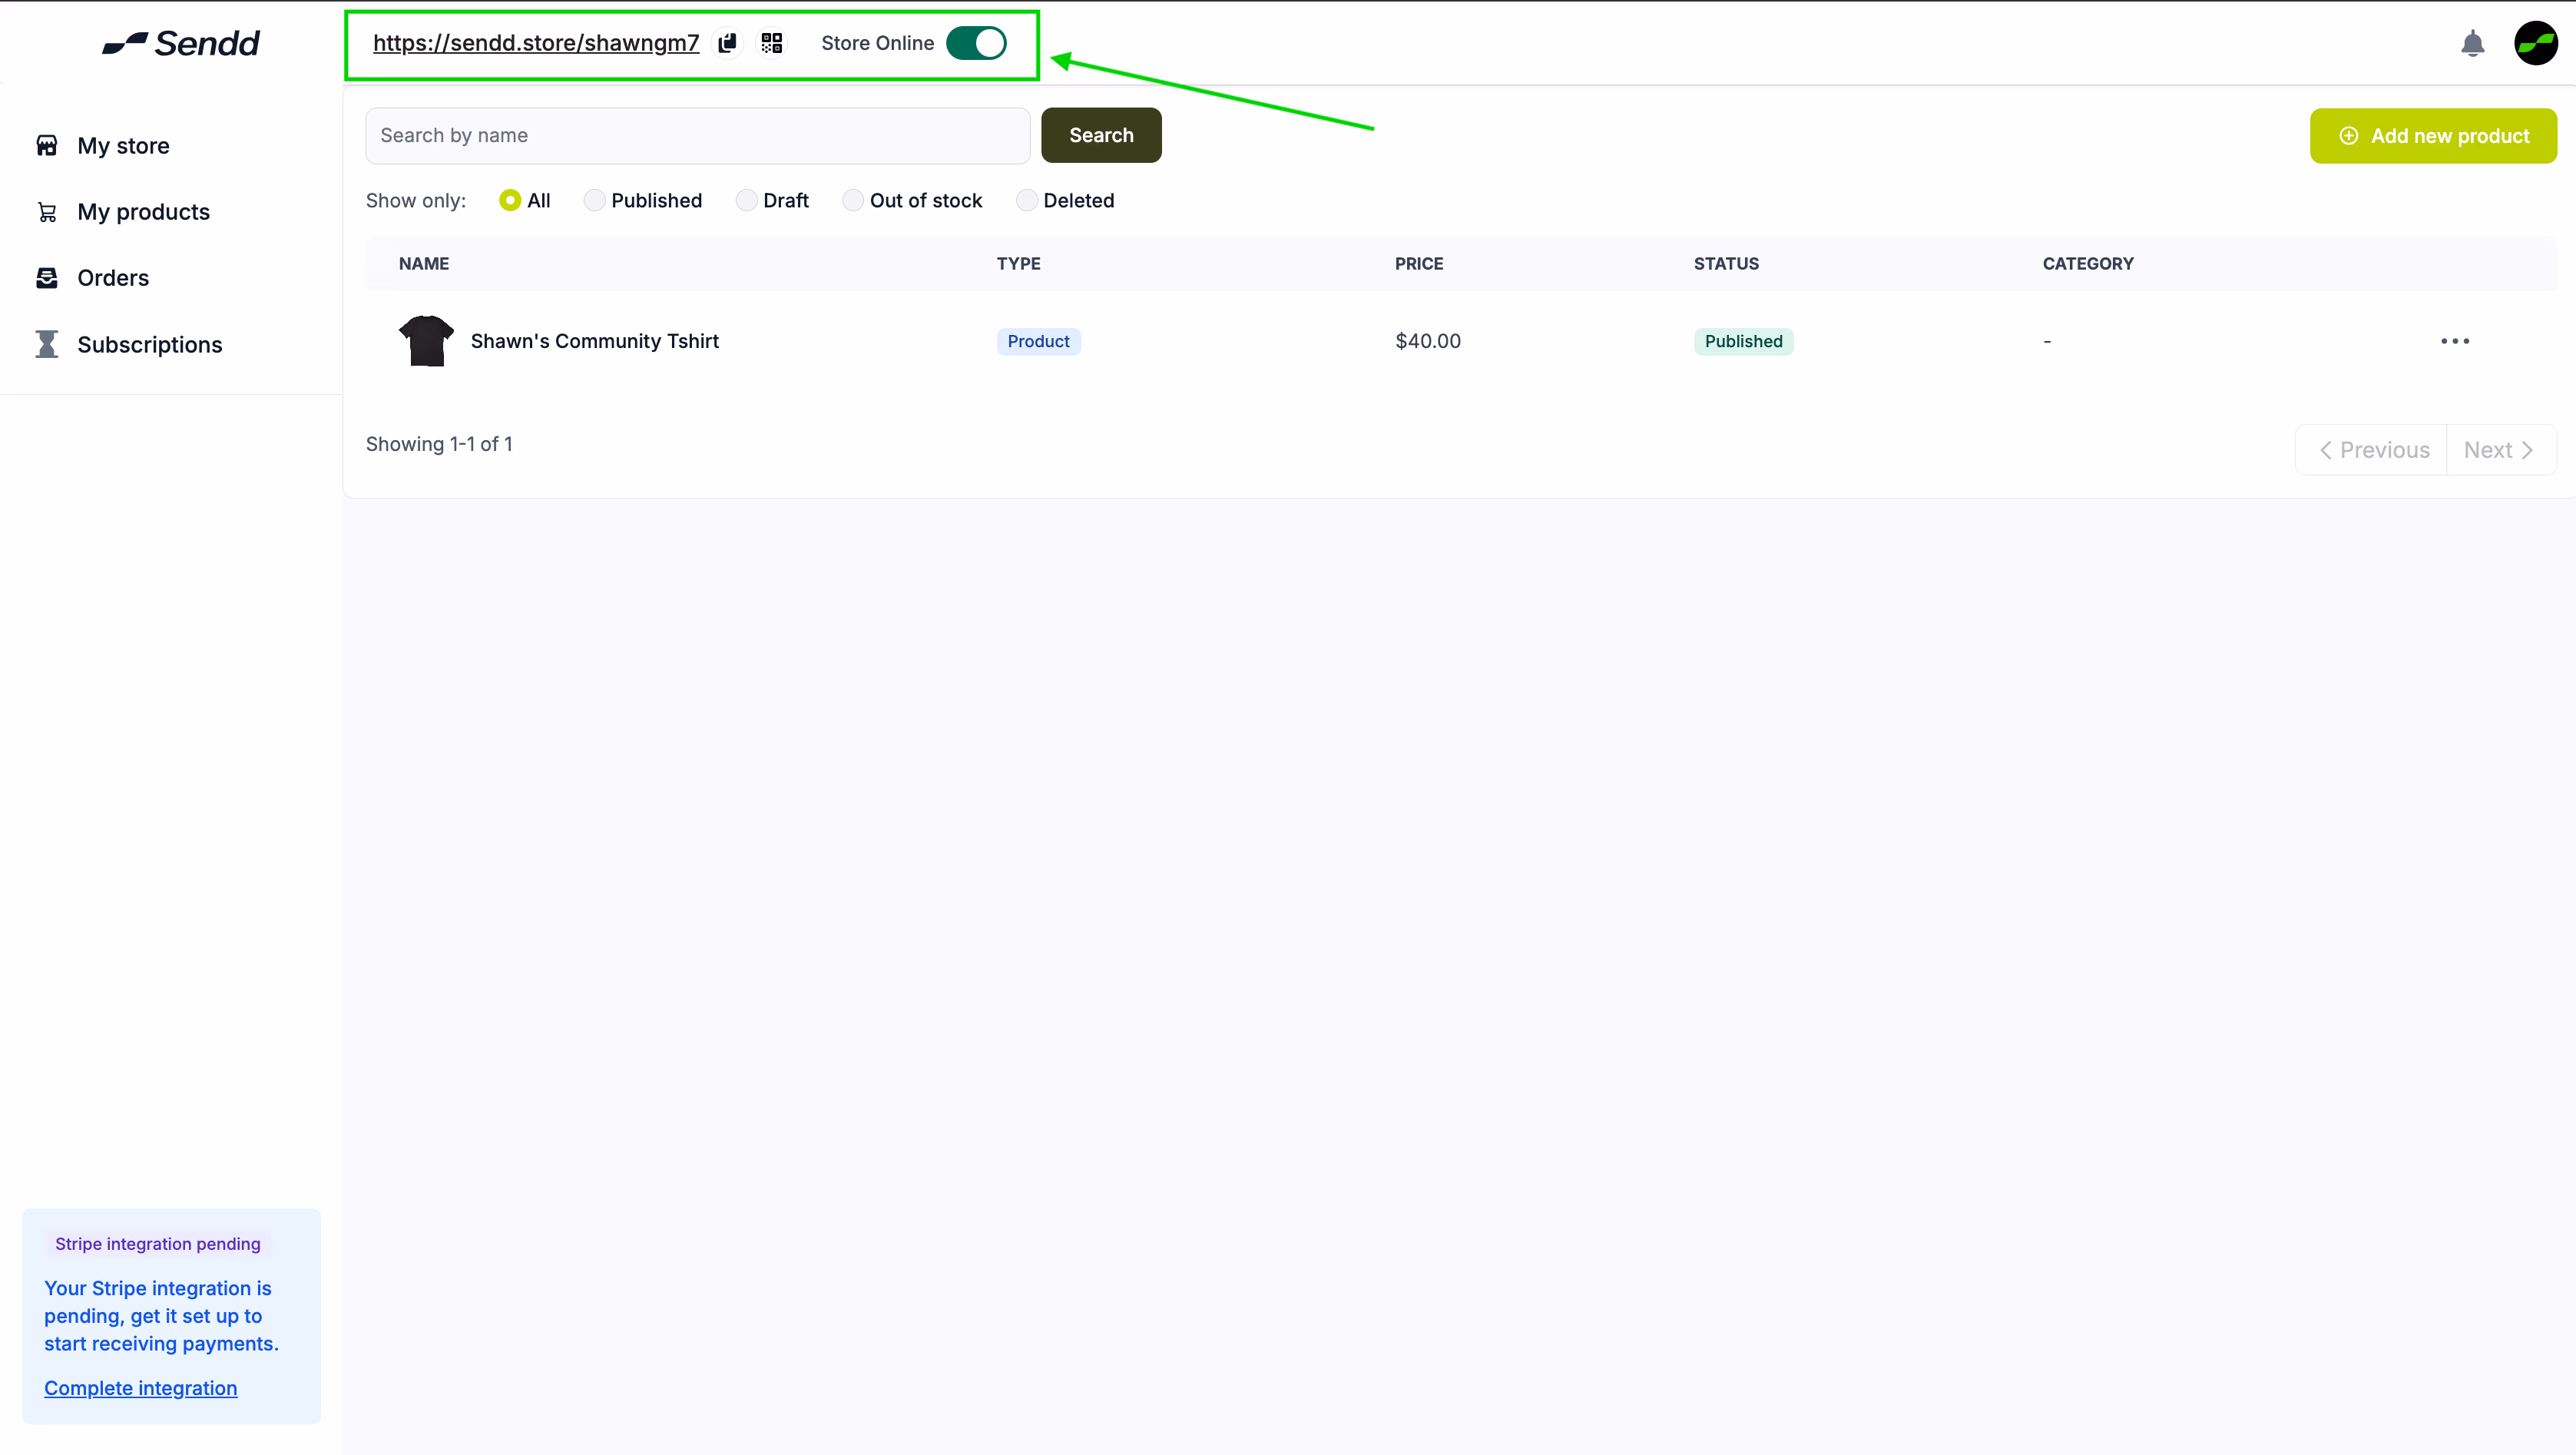
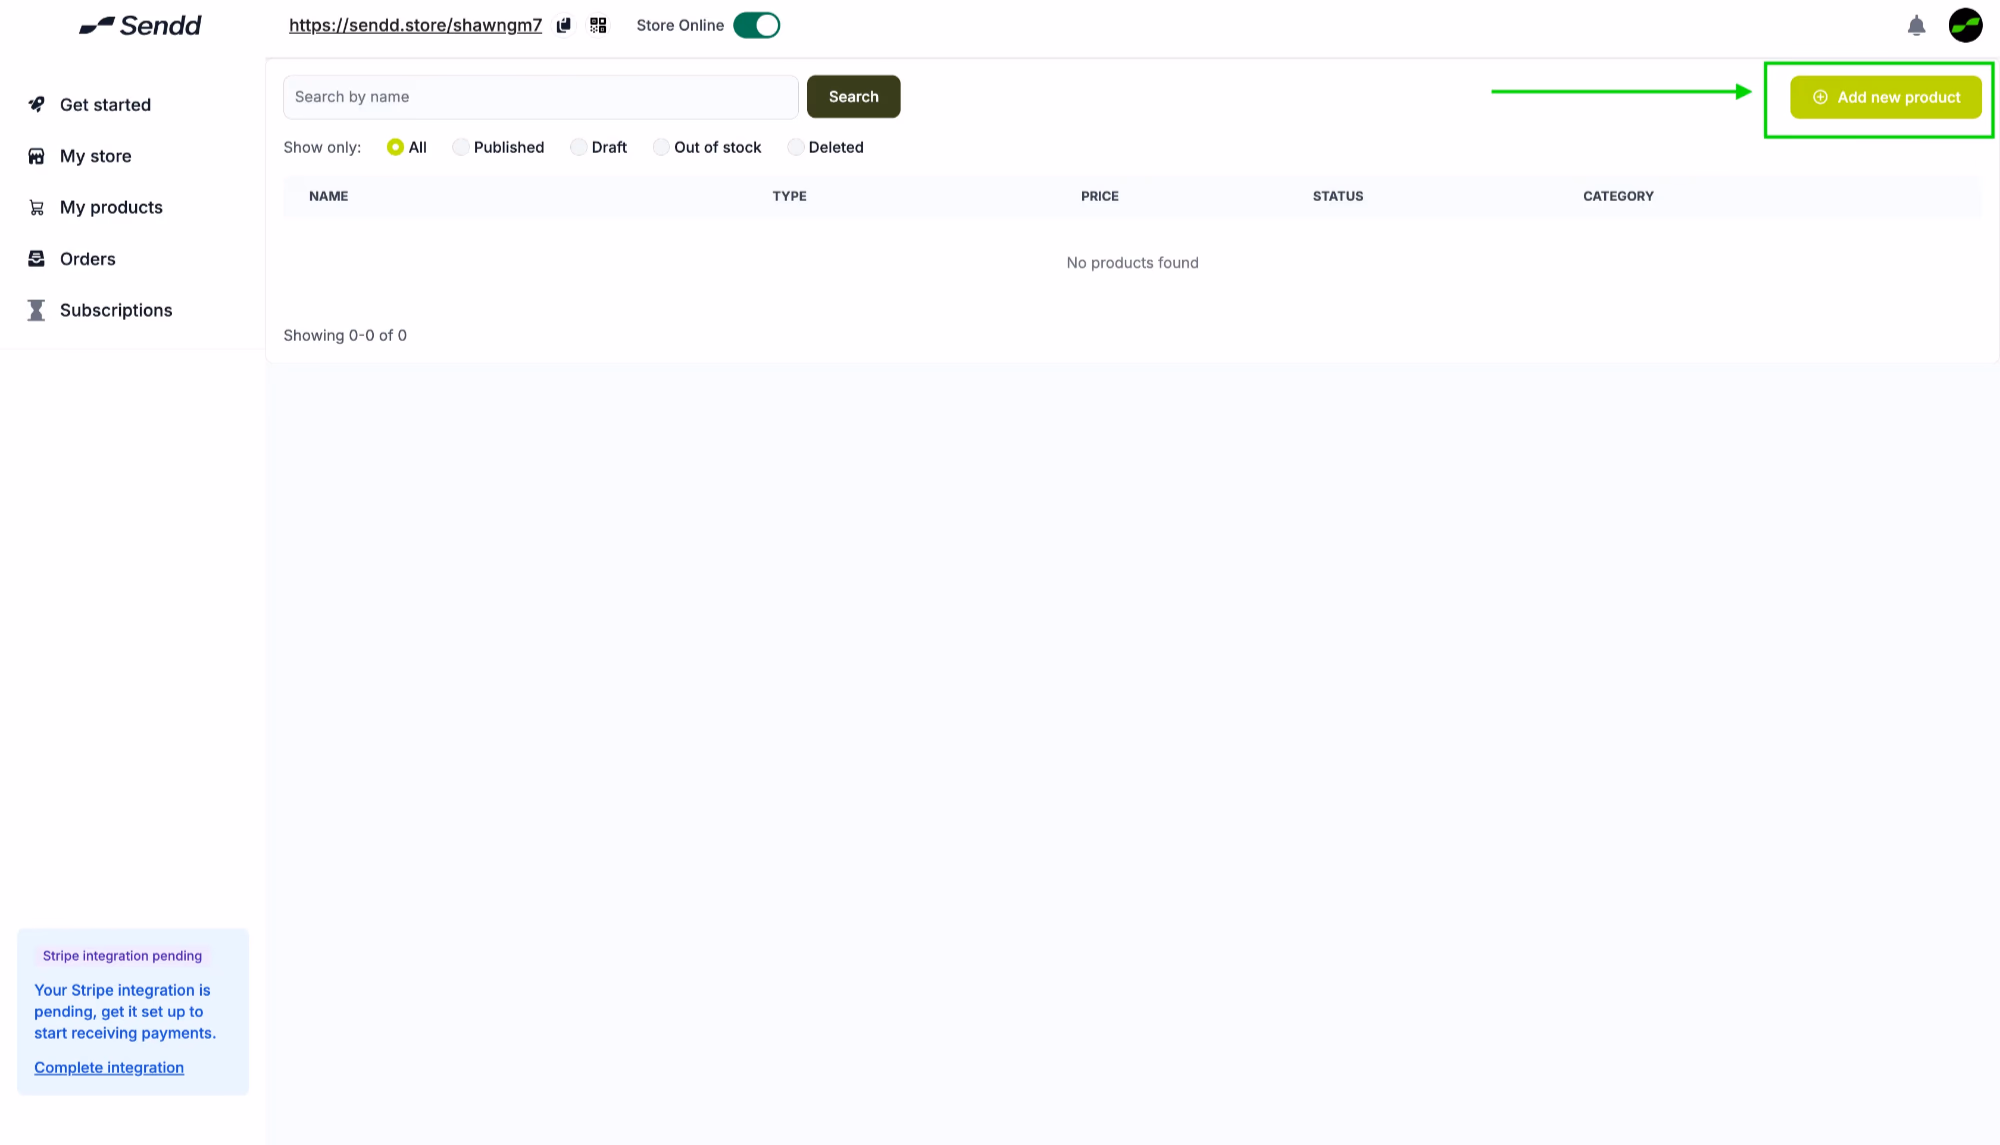
As you can see there are no new products. Let’s go ahead and click on Add Product.
-
There is the option to add different kinds of products.
| Product type | Description |
|---|---|
| Physical Product | Real-world items you ship or hand over — clothing, books, kitchenware, and more. |
| Digital Product | Downloadable goods like e-books, courses, and tutorials, delivered instantly. |
| Event | Sell, allocate, and manage tickets for in-person or online events. |
| Subscription | Recurring payments for memberships, communities, or services. |
| Custom Price | Let customers choose what they pay — perfect for donations, tips, and pay-what-you-want. |
| Rental | Rent items out by the day, across one or more locations. |
| Enquiry | Capture leads and questions when a sale needs a conversation first. |
| Link | Point customers to an external page or resource. |
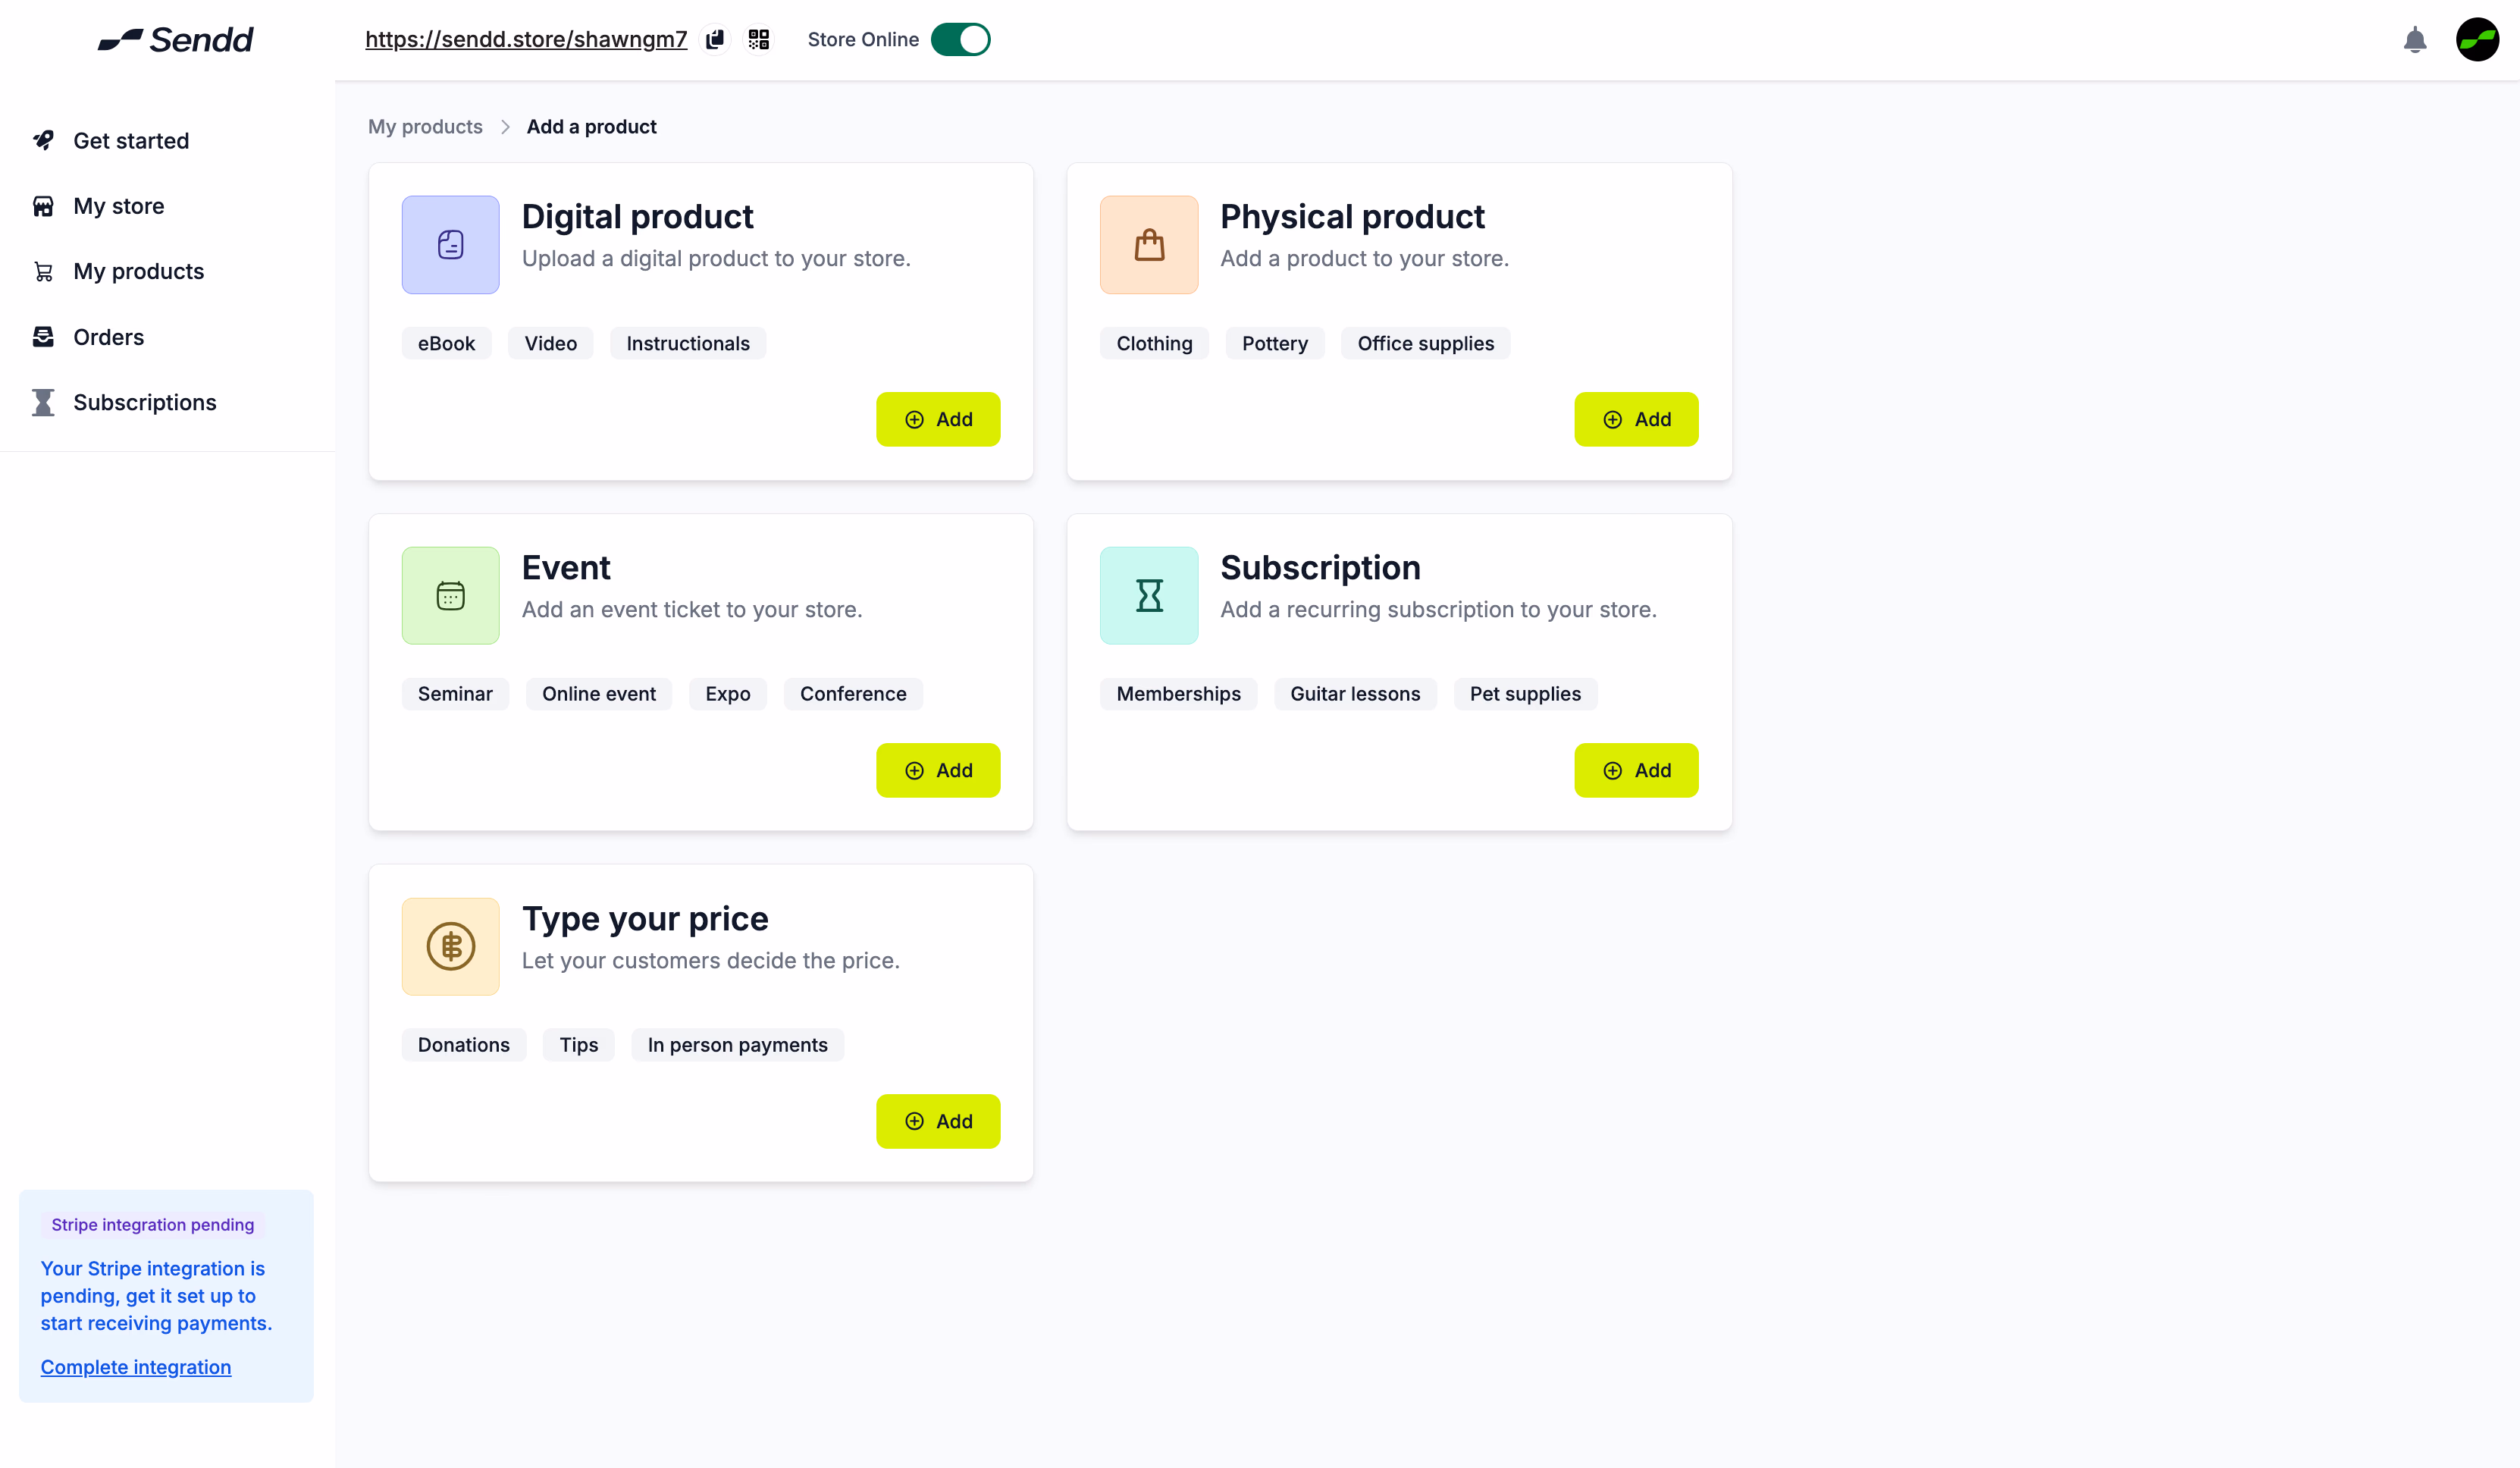
- For this tutorial, we just want to focus on setting up our Sendd Store, so let’s go ahead and add a physical product.
- Click on Physical Product.
- Fill in the details of the product.
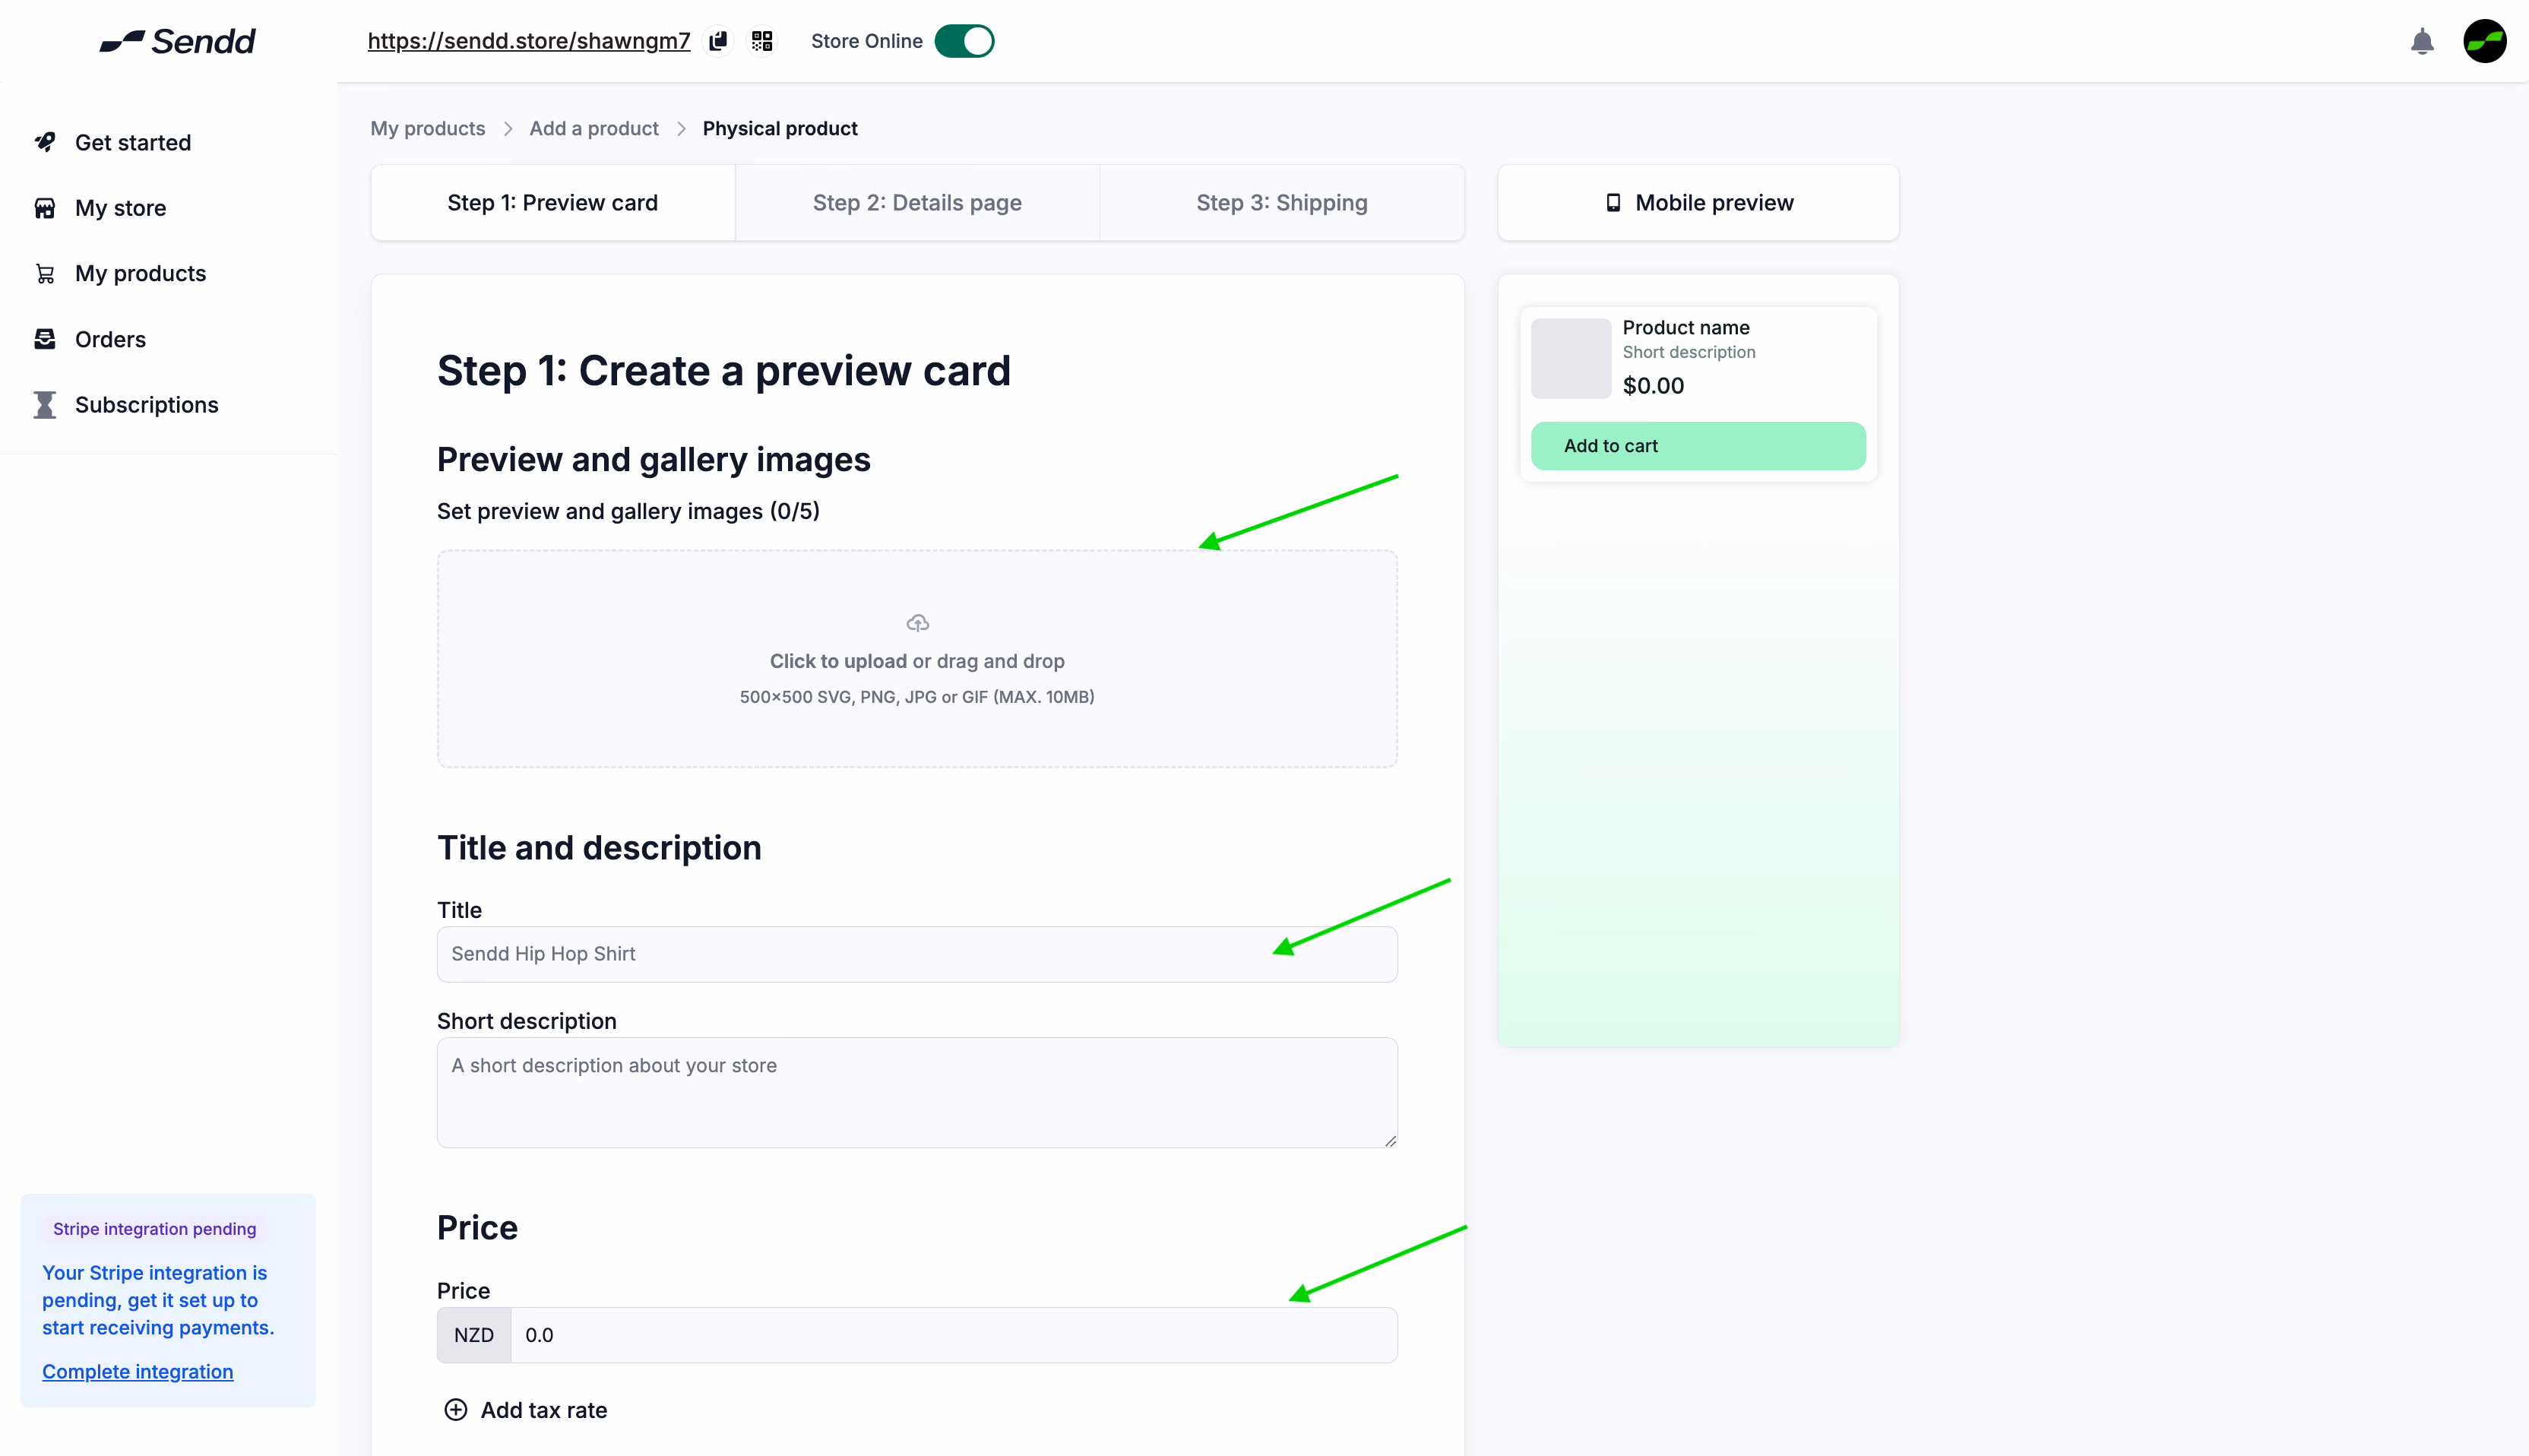
- Now that you are done with the initial description of the product through the preview card, let’s go into a little bit more detail. We can see a more:
- Detailed product description - add this description to let your customers know what they are purchasing.
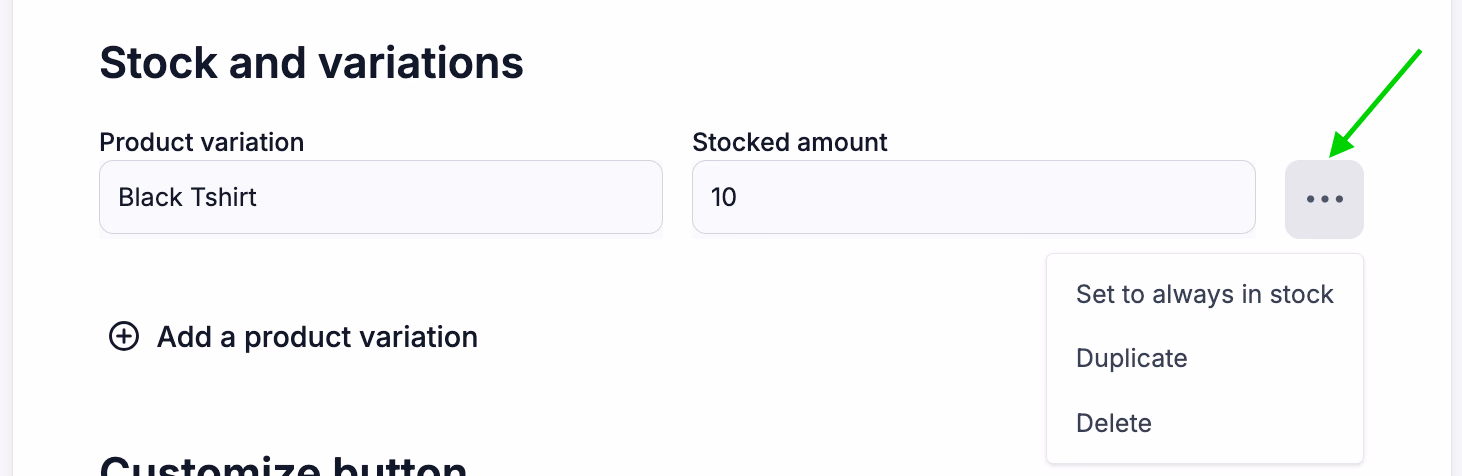
- Stocks and Variations - Helps you add additional variations of the same product (black or white T-shirts, coconut oil or rosemary oil).
- Customize Button - Lets you change what the button says.
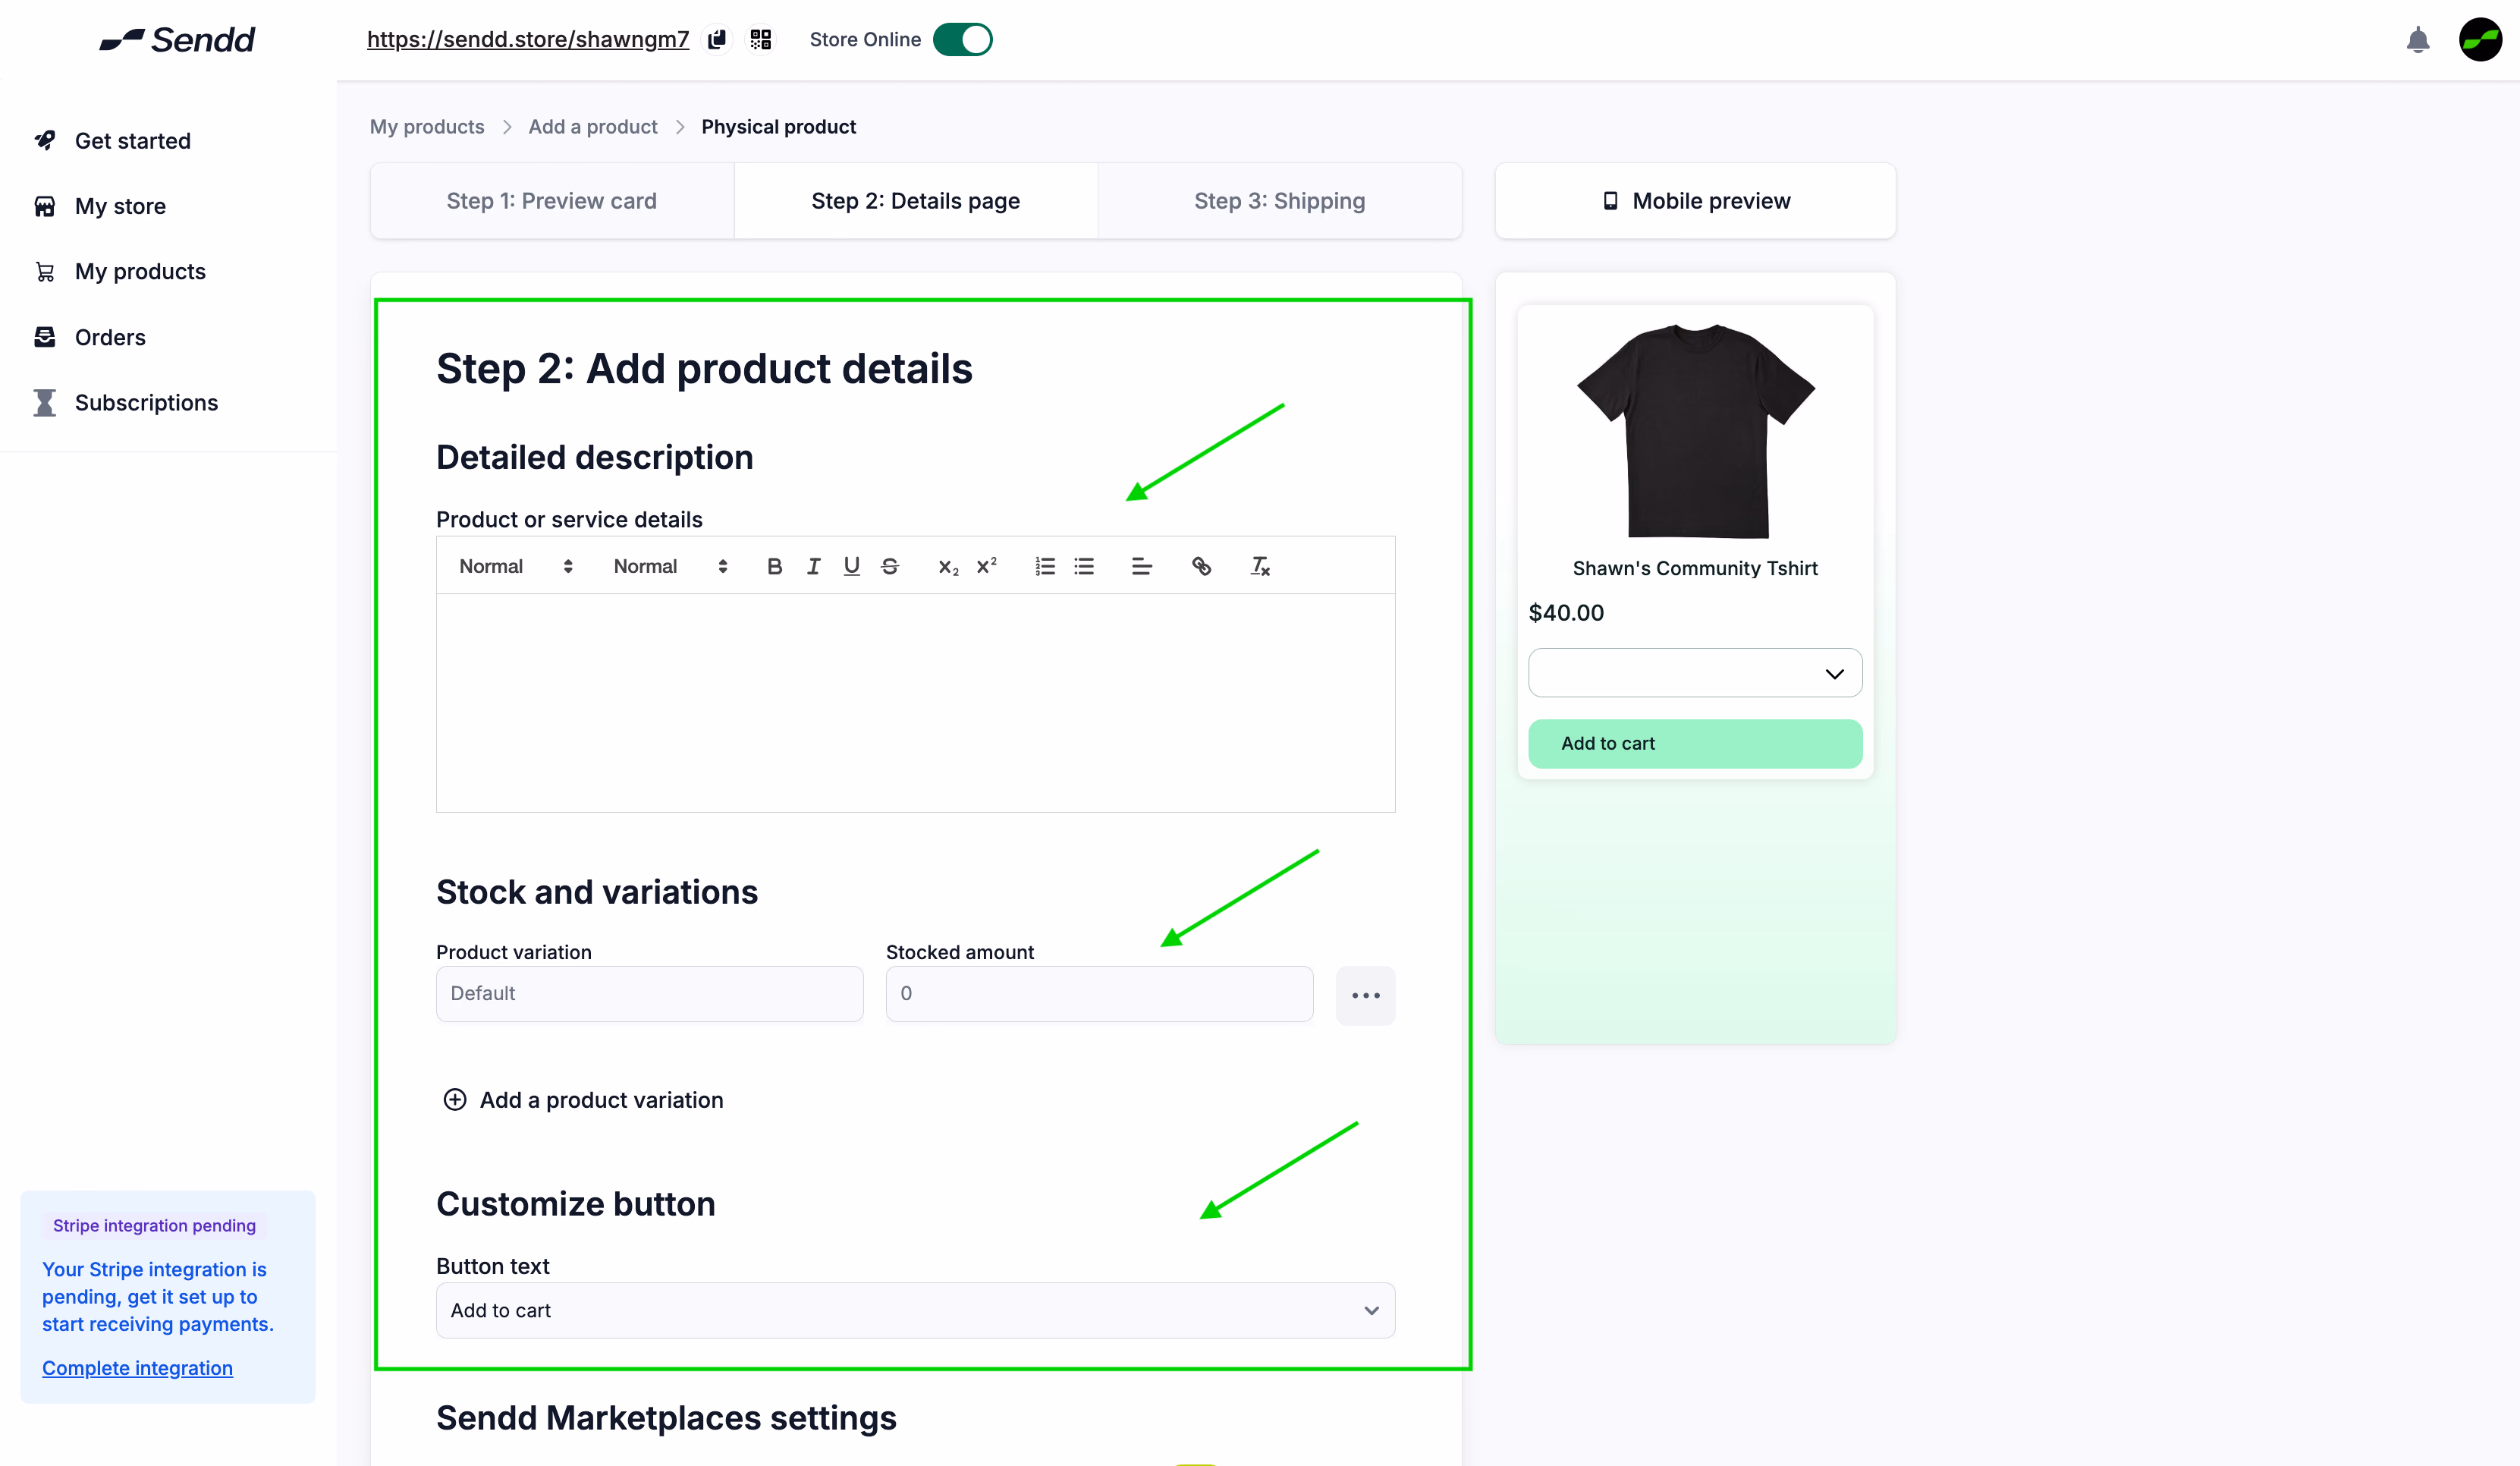
Note: For Stocks and Variations, you have the option to set to always in stock. Prices of variations can optionally be changed.
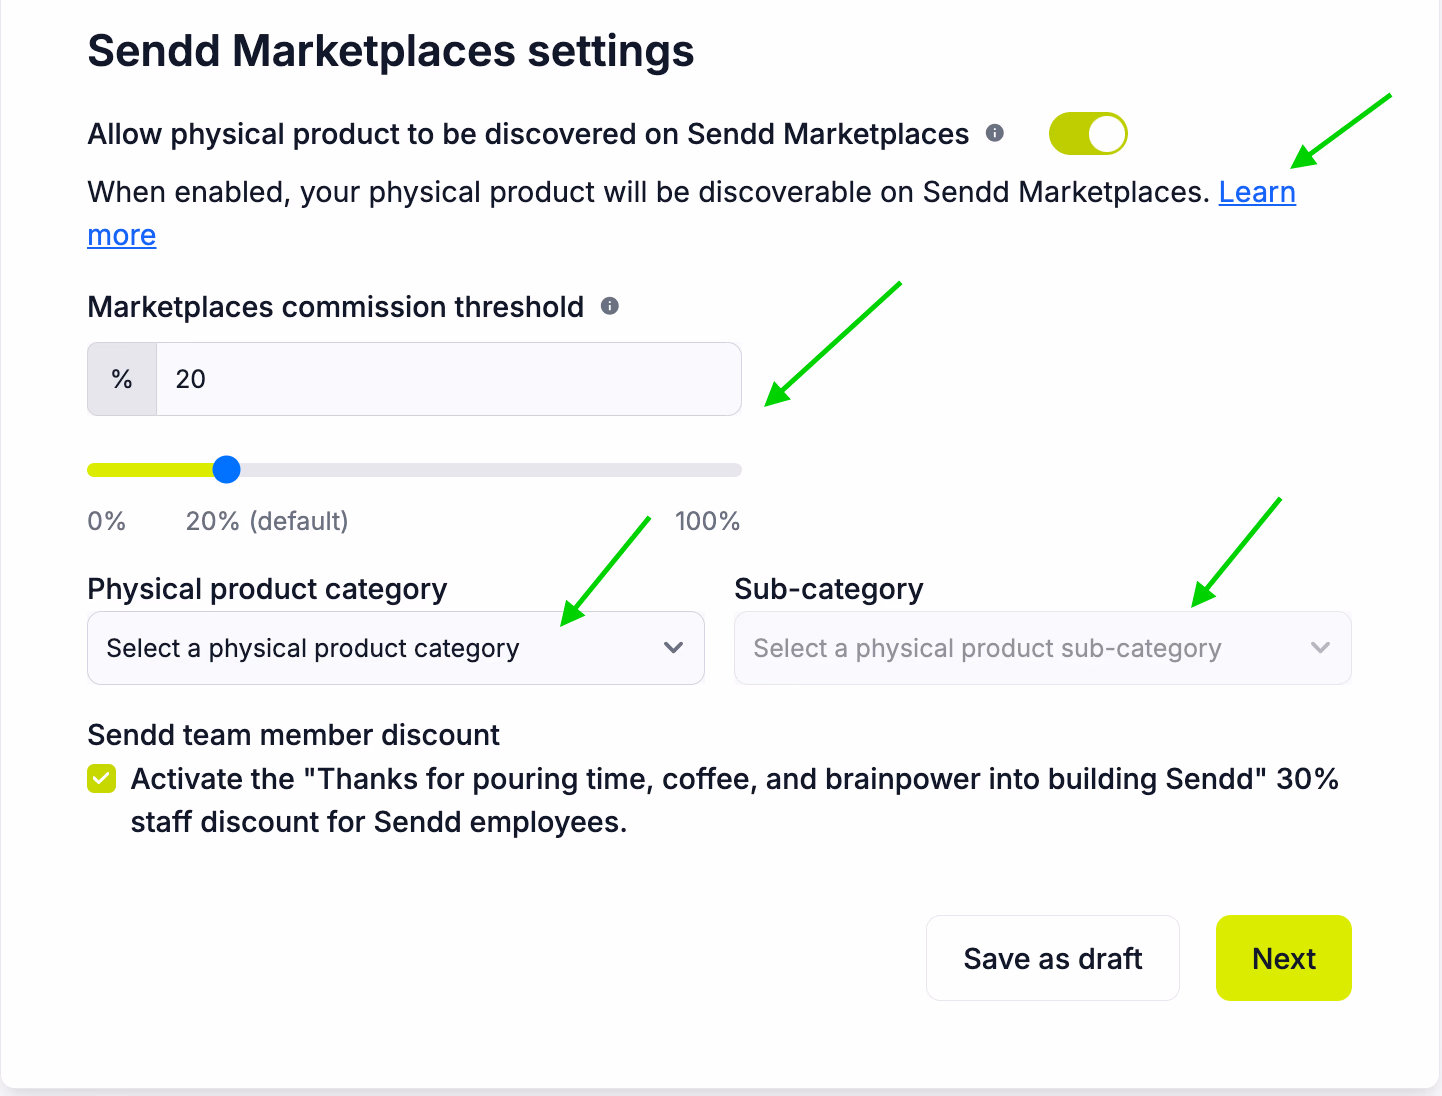
- Scrolling down, you see the Sendd Marketplace settings.
If you allow your product to be discovered on Sendd Marketplaces:
- Your product listing will be found on all the Sendd Marketplaces that are within the Product Category and Sub-Category that you choose.
- There is also a tick box if you are a Sendd Employee, in order to receive a 30% discount on marketplace fees.
- For more information on the Sendd Marketplace check out the following link: https://www.notion.so/Getting-Started-2e7bd18ddf8a8129b74bdc2fd167b073?source=copy_link
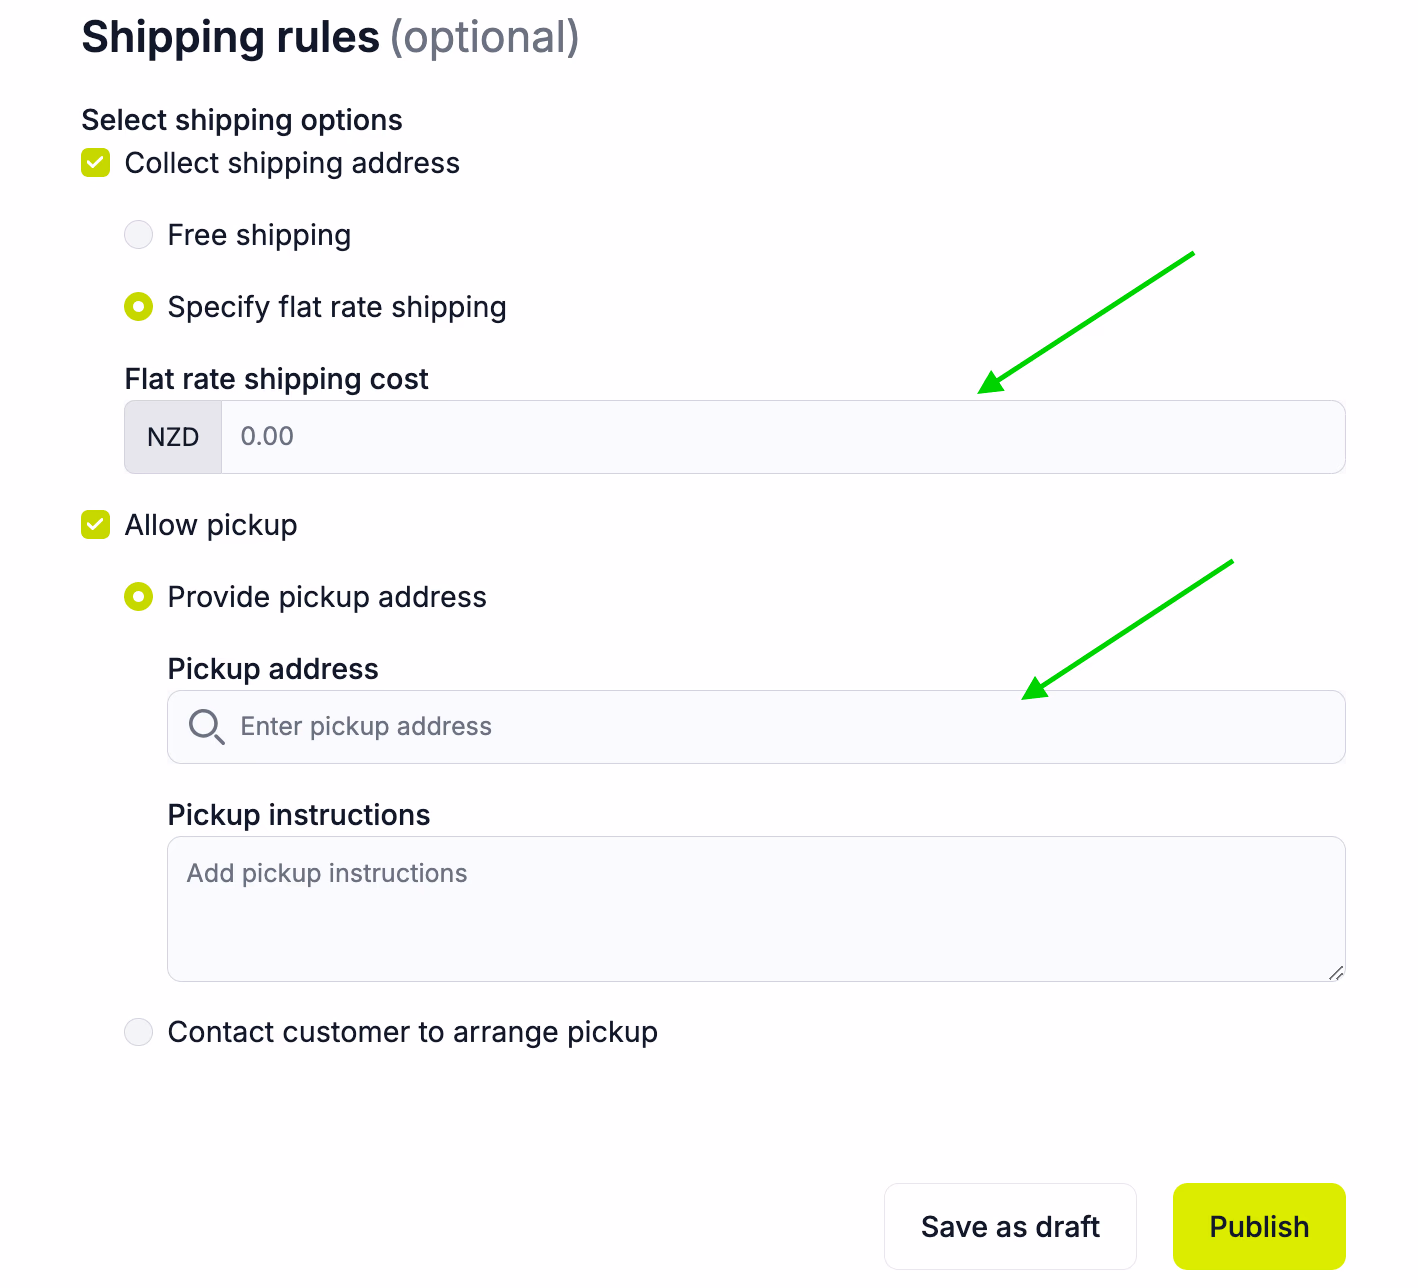
- Let’s click on Next and go ahead to the next section, where you can enter the shipping details. As shown below, you have two more tick boxes:
- To collect the customer’s shipping address.
- To allow for customer pickup.
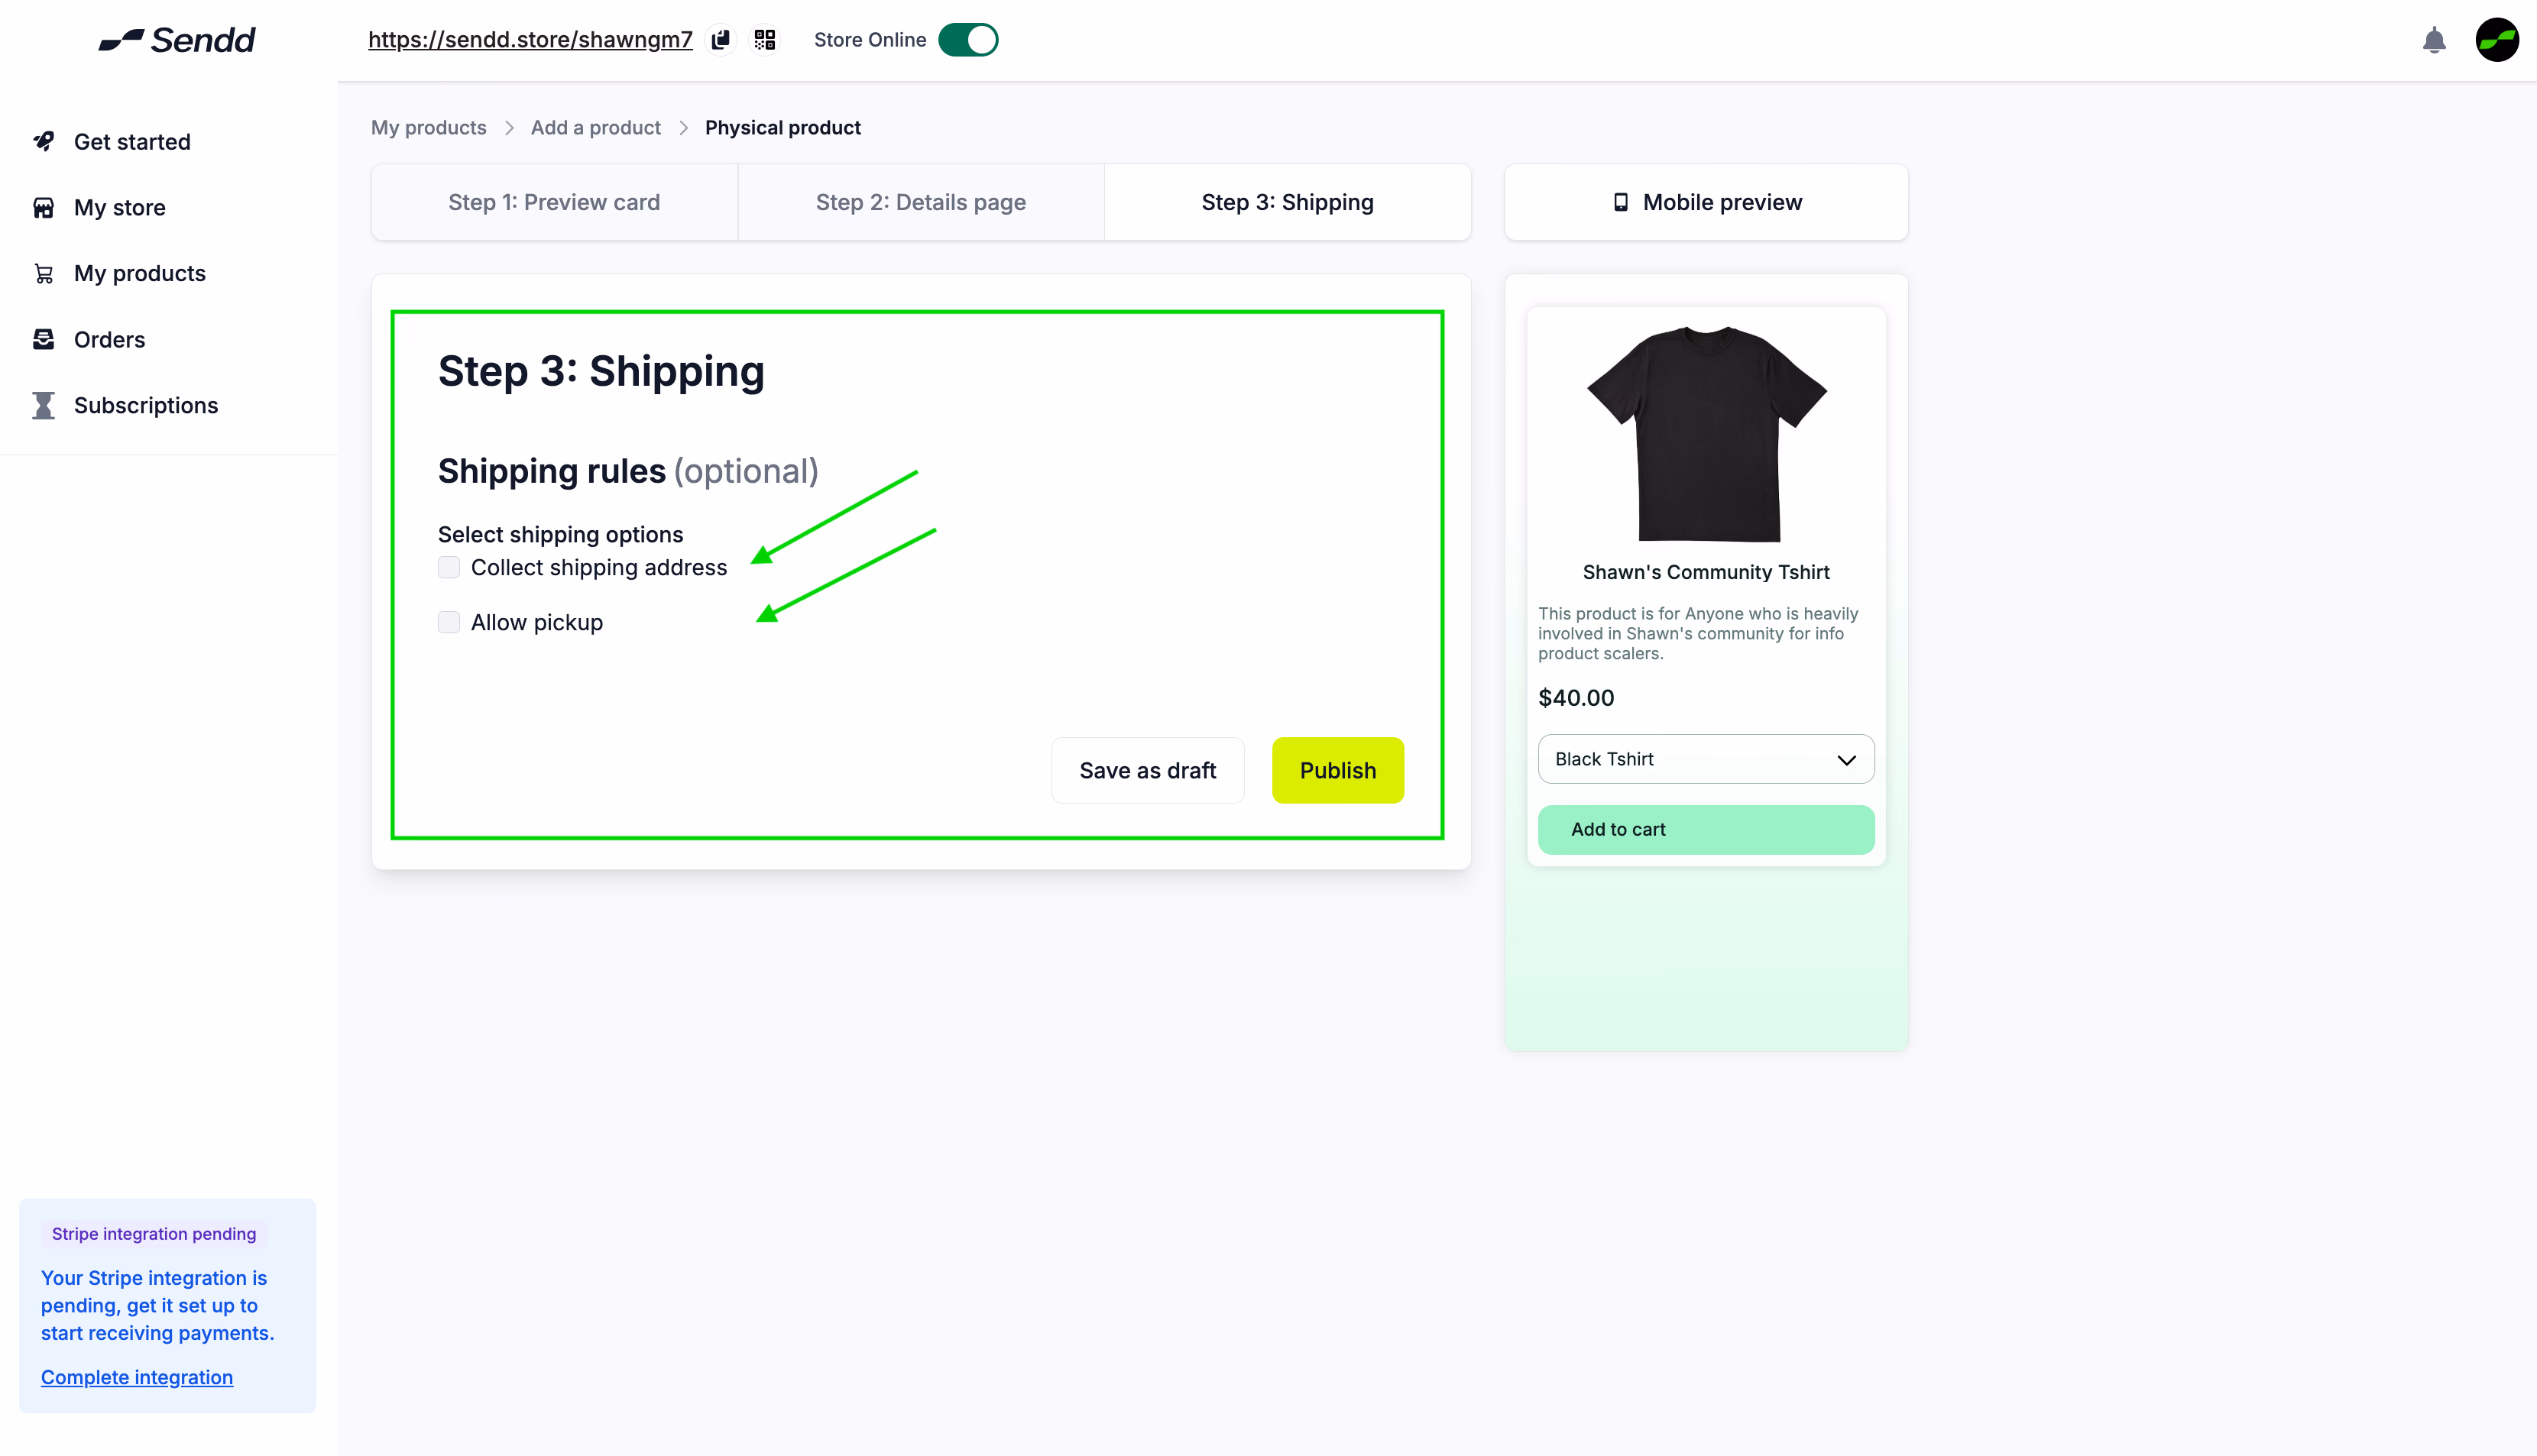
Note: For shipping, collecting shipping addresses has more details if you need to specify the flat rate shipping. Allowing for pickup has more details to be added if you provide a pickup address.
Click on Publish and now your store is live!
- Now to quickly preview your store, click on the link in the header section. It comes with a QR code functionality to download and use within your own stores.
Dont forget to click the Store Online Button to set your Sendd Store online so people can access it.
Happy selling!